Monthly Archives: September 2012

Pickles: My First Love

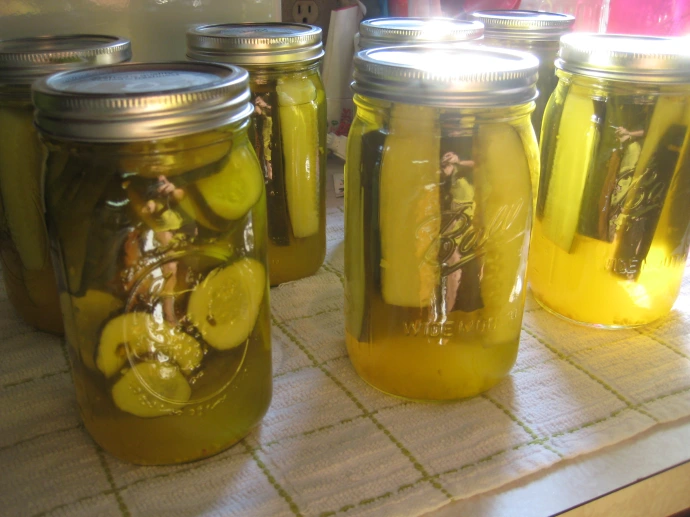
Mrs. Wages dill pickles

I think in the future, looking back on this summer, I can probably call this “The Summer of Pickles”.  I’ve made three different kinds of pickles this summer, mostly out of experimentation, and with the ultimate goal of achieving my heart’s desire:  Vlasic, without the food coloring and preservatives.  I’ve always been a Vlasic girl, and unfortunately, it looks like I’m going to continue to be one.  I just cannot seem to nail down the right recipe!  I tried Mrs. Wages dill mix, and the flavor is great, but the crunch is non-existent.  I tried fermentation, and the crunch is decent and the flavor is unique and delicious, but it just isn’t Vlasic.  The best pickle I’ve made so far, in fact, is the recipe for “Old South” pickles on the back of Mrs. Wages pickling lime mix.  It’s basically a bread-and-butter pickle, but better.  I love them, but I can’t promise my heart to them exclusively.

I’m not going to give up.  I shall pursue my quest for a Vlasic copycat.  And when I master it, you will be the first to know!

In the meantime, here are some tips for pickling cucumbers.  I actually have not followed ALL these tips yet, which hopefully is why my pickles haven’t been super crunchy.  The problem is that I’m growing my own pickling cucumbers, and I only get 2-3 ready at the same time, and I don’t really feel like putting all that effort into 2-3 pickles!  I’ve decided NOT to grow my own pickling cucumbers next year, and instead order them in bulk from my local produce market owner.  He told me that I can order them by size, which will be nice because then they will all be around the same size and ready for pickling at the same time!

Cucumber Tips:

  • Use the cucumbers the day of or up to 24 hours of picking them (for the best crunch.  You can certainly use them after that, but they won’t be as crunchy.)
  • Do not wash the cucumbers until you are ready to use them!  They start to deteriorate much quicker once washed.
  • When making dill pickles, select pickles that are no longer than 6 inches.
  • Cut 1/16 inch off each end of the cucumber.  The blossom end contain enzymes that can cause soft pickles.
  • Use only pickling cucumbers, the pickling brine will not be able to penetrate the wax coating on other cucumbers.

Brine Tips:

  • Use only stainless steel or glass equipment.  Other materials can react with the acid and alter the taste and color of the pickles.  Especially do not use wooden spoons, they will absorb the flavor!  (And, as a former Cutco salesgirl, I feel inclined to urge you to pitch all your wooden spoons and cutting boards.  They are nasty and unsanitary!  That is all.)
  • Always use high-quality commercial white distilled or cider vinegar with 5% acidity unless other types are specified in the recipe.
  • Use Pickling Salt instead of table or iodized salt, and use the correct amount called for in the recipe.
  • Use only new dried spices, if using.  Spices that have been on the shelf for over a year will not produce the best result.
  • You need soft water to make pickles.  If you only have hard water, you can soften your water by doing this: Bring hard water to a boil in a large stainless steel saucepan and boil for 15 minutes.  Remove from heat, cover and let stand for 24 hours.  Skim off any scum that has formed on the surface and carefully decant or ladle into another container, without disturbing the sediment that collects at the bottom.

(All tips were taken from the Ball Complete Book of Home Preserving)
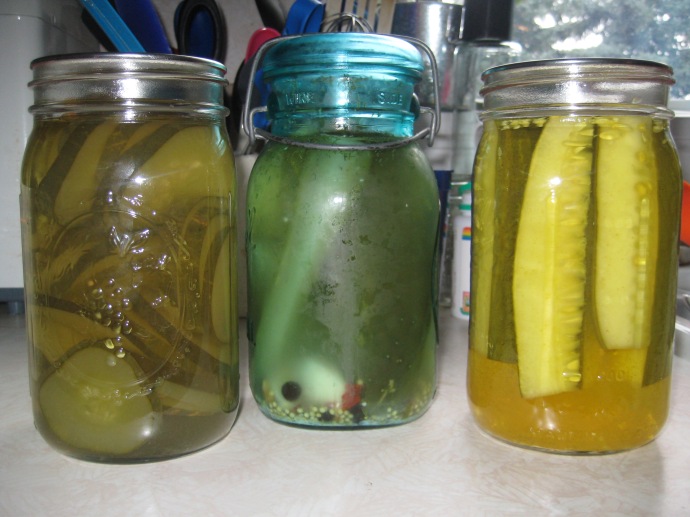
Old South on the Left, Refrigerator Pickles in the middle (How cool is that jar? I found 3 of those at a garage sale this summer!), and Mrs. Wages Dill mix on the right.

Here are a few recipes for you to experiment with:

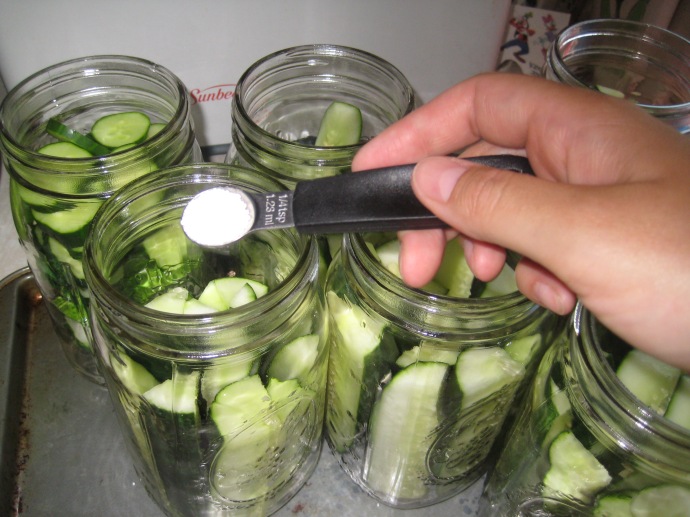
I made the dill pickles with Mrs. Wages dill mix, which is pretty simple to do.  I added Pickle Crisp, and can tell you that if you are a) not using pickling cucumbers, or b) not using freshly picked cucumbers, that even with the Pickle Crisp, you will NOT get crisp pickles.

Adding Pickle Crisp to my dills

Rather than write out a whole post on it, I will just direct you to the wonderful blog post I found for the refrigerator pickles.  Recipe for fermentation-style refrigerator pickles
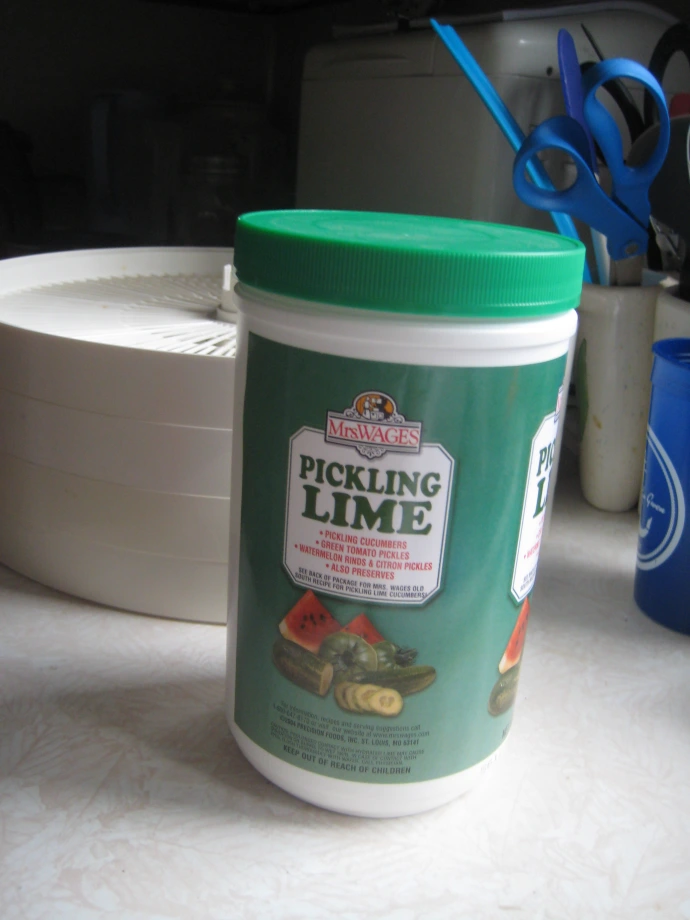
Doesn’t this jar look like something from the ’70s? I’m slightly concerned it actually might be, since I purchased it from a teeny tiny grocery store in a teeny tiny town. The mix YOU will be buying comes in 2012 packing;)

Old South Cucumber Lime Pickles

What you will need:

7 lbs cucumbers (sliced crosswise)

1 cup Mrs. Wages Pickling Lime

2 gallons water

8 cups white distilled vinegar, 5% acidity

8 cups sugar

1 Tbsp pickling salt

2 tsp mixed pickling spices

Directions:

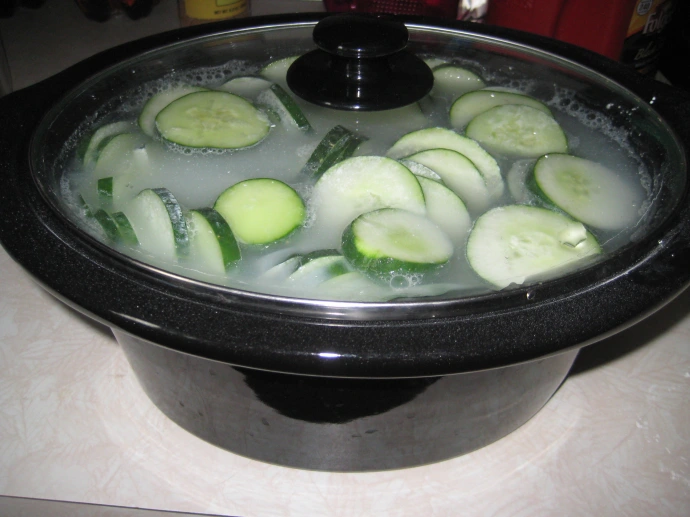
  1. Soak clean cucumbers in water and lime mixture in crockery or enamel ware for 2 hours or overnight.  Do not use aluminum ware.  (I used my two biggest crockpots)
  2. Remove sliced cucumbers from lime water.  Discard lime water. Rinse 3 times in fresh cold water. Soak 3 hours in fresh ice water.
  3. Combine vinegar, sugar, salt and mixed pickling spices in a large pot. Bring to a low boil, stirring until sugar dissolves.  Remove syrup from heat and add sliced cucumbers.  Soak 5-6 hours or overnight.
  4. Boil the slices in the syrup 35 minutes.  Fill sterilized jars with hot slices.  Pour hot syrup over the slices, leaving 1/2 inch headspace.  Cap each jar when filled.
  5. Process pints 10 minutes, quarts 15 minutes in a boiling water bath canner.
  6. Test jars for airtight seals according to manufacturer’s instructions.

(Recipe taken directly off the jar of Mrs. Wages Pickling Lime!)

The Old South pickles are pretty good!   It is a labor-intensive recipe, but I really like them and think it is worth the effort.  I will be making them again next year.

I’m still getting cucumbers out in my garden, so when I get around to it, here is  The next pickle recipe I’m going to try!

Wish me luck!  And good luck with your own!

Categories: Canning, Fermentation, High-Acid, Pickles | Tags: , , , , , , , , , , , ,

Basic Tomato Sauce and Condensed Tomato Soup

I’ve been making my own tomato sauce for several years now and have gotten into a certain…rhythm.  It’s not a difficult process, per se, but it is time consuming and extremely messy.  So messy, in fact, that the first time I made tomato sauce as an adult (without the tutelage of my wise mother) I swore I would never put myself through such an ordeal again.   My kitchen was a disaster and my sauce turned out thin and uninspiring.  In fact, I didn’t even use some of the quarts I had canned because looking at them brought back such unpleasant memories!   (Who says cooking isn’t an emotional experience?)

Those days are gone.  I’ve trial-and-error’d tomato sauce to a Chelsea Perfection: a rhythm I am pleased with, and a product I am thrilled with.  There is no need to blanch and peel the tomatoes, and all you need is a food processor and a strainer!

Step 1 – Choosing Tomatoes:  Choose the right kind of tomatoes!  If you can, use at least 50% of your batch with Romas.  They are small but meaty, and will give you the consistency of sauce you desire.  I like to blend 3-4 kinds of tomatoes to get the best flavors.  This year I planted and harvested Romas, 2 kinds of Heirlooms, and Better Boys.  Or Big Boys.  Or Early Girls.  I can’t remember.  I’m not sure it matters.  They’re red and if you let them get very ripe on the vine they have an amazing flavor…or so claims my husband.  I hate raw tomatoes, but adore all tomato products.  I know, I’m weird.

Step 2  – Preparing Tomatoes: Wash the tomatoes, slice in half, and cut out any blemishes, spots, cracks and the cores.  I then quarter them, and throw them all into a stainless steel pot.  According to the Ball Book of Home Preserving, “the acid in tomatoes can react with aluminum, copper, brass, galvanized or iron equipment, creating bitter flavors and undesirable colors”.  Turn the heat on medium, and cook them down into a mush.  Sometimes I even take a potato masher and make sure the chunks are practically liquified.  This isn’t totally necessary, but it does help to speed the process up a little.

Step 3 – Process and Strain: Here comes the messy parts!  I set up a work station like this:

Tomatoes in pot on stove (yes, I realize this is not a stainless steel pot. I’m a rebel.), next is food processor, next is the pot sauce will get strained into, then a waste bowl for the seeds and skins.

Once the tomatoes are completely cooked down, and resemble sauce more than whole tomatoes, break out your food processor.  Ladle a few cups of mush into the food processor and blend for several seconds.  Then transfer the liquid to your strainer.  Jiggle the strainer a bit to get all the juice through, then – with moderate force – bang the strainer down on the edge of the bowl to encourage the sauce through.  This doesn’t take very long, less than a minute.  There is no need to use a spoon to force it through, just do a variety of bang-bang-jiggle-jiggle’s on the side of the bowl.

Bang-Bang-Jiggle-Jiggle!

Once all the sauce is forced through the strainer, all that is left is the skins and seeds!

Step 4 Reduce Sauce:  Once all the mush has been processed and strained, return the pure sauce to the pan.  I usually rinse or wash the pan first, to make sure there aren’t any rogue seeds left in there.  Now assess your sauce.  Is it already the consistency you desire?  If so, you are ready to can, freeze or use it.  If it’s still a little thin then you want to reduce it.  Reduce is a word that the meaning of which eluded me the first time I made sauce.  What reduce means, in the cooking world, is to bring your sauce to a boil, then turn the heat down to a simmer, and let the sauce simmer for some time until the amount of sauce has decreased.  What happens during this time is that the juice evaporates, and the overall quality of the sauce thickens.  Depending on the type of tomatoes you use, sometimes you need to reduce your sauce by half!  (Meaning, you will get 2 quarts instead of 4!)  Try not to let this discourage you, as it did me at first.  You will be much happier with a thicker sauce when the time comes to use it, and even though it seems frustrating to “lose” half your sauce, you really want a nice, thick sauce in the end.

So anyway, if you need to reduce your sauce, do it now.  This might take an hour, so be patient.  Keep the heat on simmer and stir occasionally.  I usually need to reduce my sauce by a third, using the 3-4 kinds of tomatoes that I use, and it takes about 45 minutes to an hour.

Your finished product is a pure, no-additives, nice, thick tomato sauce from scratch!  At this point, you can use it, transfer it to freezer-safe jars or bags (you should let it cool first!), or you can can it.

Step 5 – Clean your kitchen!  Messy stuff, eh?

Canning Tomato Sauce

How much sauce you will yield will depend on how many pounds of tomatoes you started with, and how much you needed to reduce your sauce.  It’s highly variable.  I usually get about 3 quarts out of a full large stockpot of quartered tomatoes.  You will really have to play it by ear and hold off on preparing your jars and lids until your sauce is done so you can eyeball it and see how many jars you will need.

See the canning process for a boiling-water canner here, (you can also pressure can tomato sauce…more on that at a later date!) adding these steps:

  • Tomato products need bottled lemon juice added.  Add 1 tablespoon to pints and 2 tablespoons to quarts.
  • Process pints for 35 minutes and quarts for 40 minutes.

Jars acclimating to room temperature

Condensed Tomato Soup

Makes 4 pints.

In my quest to rid my cupboards of Campbell’s (*sniff* I love Campbell’s!), I needed to come up with a condensed tomato soup version.  I could just make a delicious tomato soup and freeze it like a normal person, but normal people think ahead and pull stuff out of the freezer the day before they want it.  I never know I want tomato soup until about 10 minutes before I HAVE to have it, so freezer soup isn’t gonna cut it!  There’s also that tricky problem that you’re not really supposed to can anything with thickeners or dairy due to heat’s inability to penetrate those types of fat for safe consumption.  SO, I’m shooting for a product very similar to Campbell’s Condensed Tomato Soup.  Open jar, add milk, microwave.  Yum.  Here’s what I came up with, and it’s shockingly easy.

What you need:

  • 8 cups tomato sauce
  • 2 tablespoons sugar (more or less to taste)
  • 1/2 teaspoon garlic salt
  • 1 teaspoon salt
  • bottled lemon juice

Directions:

1. Bring sauce to a boil, add sugar.  Add 1 tablespoon of lemon juice to each pint.  Follow these basic steps for canning with a boiling-water canner, and process pints for 35 minutes.

2. When ready to use, open jar and dump into bowl.  Add half a pint (1 cup) of milk, and warm on stove or in microwave.  I usually add shredded cheese to my soup (I like a lot of cheese.  Like, a ridiculous handful.  And I wonder why I’m chubby.)  Serve alone or with grilled cheese sandwiches!  (No, the grilled cheese sandwiches do not always replace the insane amount of cheese I put in my soup.  I have problems.)

The Verdict:

It tastes very similar to Campbell’s!  It’s a little more tangy, which I like.  I am absolutely thrilled to be able to have the convenience of canned soup that tastes almost exactly like the real thing without all the cons – BPA, high fructose corn syrup, etc.  It’s a keeper!

Categories: Canning, Freezing, High-Acid, Soup, Tomatoes | Tags: , , , , , , , , , ,

Create a free website or blog at WordPress.com.