Freezing

I’m Back! Updates and Strawberry Freezer Jam..

Phew!  Time sure flies when you’re having fun!  It also flies when you’re prioritizing differently, doesn’t it?

Let’s see:  Since January lots has happened!

1.  Most importantly, we found out we’re expecting another baby!  I alluded to a big surprise in my last post, and had meant to update way sooner, so for those of you who were waiting with baited breath (ha!), I’m sorry!  I’m due in early September, and I have a whole separate post about what gender this little one is coming up!

Big Sibling Book!

Big Sibling Book!

2.  I stopped babysitting.  That was a hard decision to make, but it all kind of unfolded very quickly and smoothly…kind of like what happens when you start listening to God and obeying Him.  I was watching three little ones in addition to raising my own two girls, and then all three of us mamas got pregnant, which meant by the time my baby came, I’d have one 6-year-old, three 3-year-olds, one 2-year-old, and three infants.  I was going to hire my mother-in-law to come help me several hours a day, but even if that would have worked out (which it wasn’t go to) I started realizing that the hours she wasn’t there was going to be extremely hard on me.  So I asked one family to find another sitter (that was a hard decision!) and shortly after that the other mama needed to quit her job for the health of her pregnancy and decided she was going to stay home when her third arrived.  So it was an abrupt end to babysitting for me, but it has worked out nicely, actually!  I decided not to get back into it, because I’ve been enjoying it just being me and my girls again… plus I’m not superwoman… I think having a newborn and starting homeschooling 1st grade in the fall is going to be enough for my brain to handle!

DSC03480

This is what my house looked like all winter

A rare day "warm enough" to venture out

A rare day “warm enough” to venture out

Winter1

It was pretty fun to have our own sledding hill!


3.  I don’t know about you all, but this winter took a toll on me.  I think the combination of not being able to take all the kids outside hardly at all, nor being able to leave my house…nor really WANTING to leave in the frigid temps…has opened my eyes to just how amazing this era is that we live in. I have a whole new appreciation for Laura Ingalls Wilder and the rest of the pioneers.

Can you imagine experiencing a winter like ours without whole-house heating?  Can you imagine having to try to feed and water your livestock during a blizzard?  Just trekking out to give my poor chickens water twice a day was brutal enough!  Can you imagine not seeing another soul outside your family for an entire winter?  Seeing my daffodils push stubbornly through snow this spring brought tears of sublime joy to my eyes.  I imagine Mary and Laura Ingalls felt that way, too.  Sending my children outside to run and play and GET OUT OF MY HAIR and opening the kitchen window to feel the breeze while I did dishes for the first time this spring made me close my eyes in ecstasy.  I imagine Caroline Ingalls felt that way, too.  I think we can all stand united, from this century to the ones long past, and give a big cheer for SPRING!

Chickens

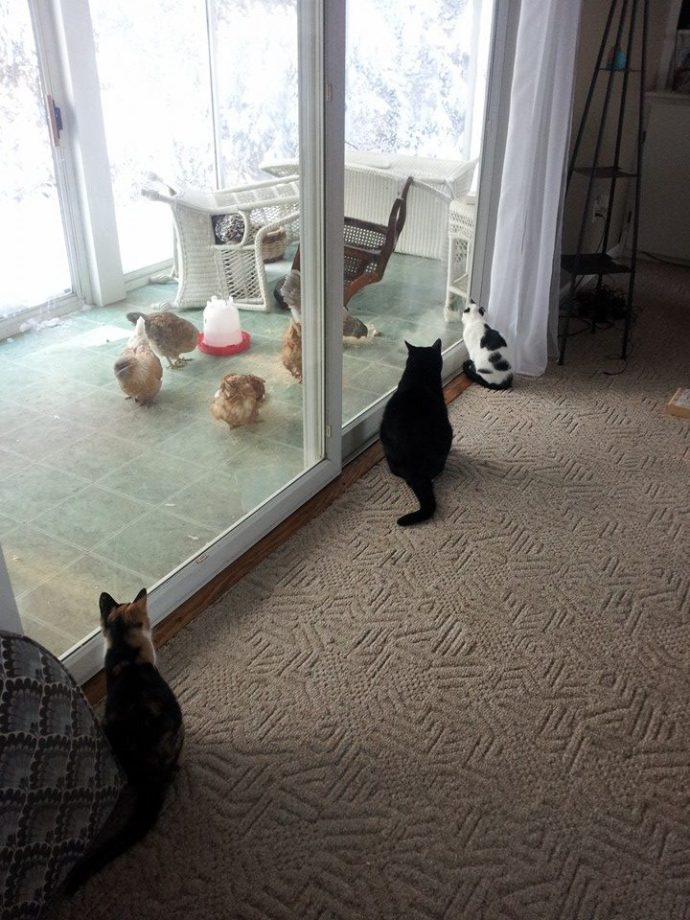
Kitty TV! Cider on the left, Toopweets, and Pancake on the right.


4.  My chickens.  My poor, poor chickens!  I had a big learning curve with poulty this horrid winter.  For starters, I realized that even though we had one day with a -40 windchill, and FEET of snow out there, the hens could survive.  It was totally unnecessary to bring them onto my back porch to dirty it up with a shocking amount of poo in 12 hours.  It helped me sleep better, anyway.  Despite all my babying, the poor girls were picked off one and two at a time over the winter.  Desperation drove predators to this easy meal, and one clever hunter even figured out how to get into the coop!  The last two were likely carried off by coyotes…after the coop raid they were too scared to go back to the coop, so they hunkered down in front of the house for about a week before they were taken.  So, sadly, I am chickenless right now.  I haven’t replaced them yet because I’d like to sell my coop and get a different style.  I’m also torn between getting hens or chicks…votes?

Half1

“Looks like running, Feels like walking” ha ha!

My big brother, Zach, and me.  Typical shot of us.

My big brother, Zach, and me. Typical shot of us.

5.  Over the weekend I ran a half marathon!  And by ran, I mean walked. 🙂  But still, walking 13.1 miles whilst 21 weeks pregnant is something to be proud of, which is why it’s a bullet point here.  It took me nearly 4 hours, but I had a book on my iPod and I had a good time!

Where is the next porta-potty??  Baby on the bladder, people!!

Where is the next porta-potty?? Baby on the bladder, people!!

I’m still a little sore, which tells me I need to do more walking than I have been doing!  I’d been training for this half and had intended on running it, but I ran 10 miles at 19 weeks and between then there was a lot of growth happening with baby and it just was not comfortable to run anymore.  But I still got to cheese over the finish line and get lots of bragging rights!


6.  This morning my oldest, Cozy, saw something on TV about making “jelly” and asked if we could make some.  We hardly ever eat jelly or jam…like, seriously, one jar can last a whole year in my house.  Consequently, I never bother to make it because it would expire long before we got to it.  But when you have a love for cooking and preserving that has been ignored for months and your darling blue-eyed 6-year-old asks you to teach her how to preserve… “Sure!  Sounds like fun!”  So I found a recipe for a quick and easy strawberry freezer jam and we had a lot of fun making it!  The girls washed the berries for me and then helped me mash them:

DSC03694DSC03698


We added gelatin instead of pectin because I have loads of it:DSC03699


Letting it cool before sticking it in the freezer/refrigerator:

DSC03700

(I stuck the jar intended for the fridge in the freezer so it would hurry up and set before lunchtime)


Taste-test time! DSC03701DSC03707  Yum!  It’s a little runnier than I’d like jam to be, but the flavor is really good!  I’m ok with the runny consistency because I’ll use this in my yogurt way sooner than we’ll eat it on toast, so it will actually be easier to mix in for me.  But if you want this to have a better spreading consistency, I would either switch to pectin, or double the gelatin amount.


Strawberry Freezer Jam (Makes 4 half-pints)

  • 4 cups cut strawberries
  • 1/3 cup sugar
  • 2 Tbsp lemon juice
  • 2 envelopes (1 1/2 Tbsp) unflavored gelatin (double for thicker consistency)
  • 1/2 cup cold water

1. In medium saucepan heat strawberries, lemon juice and sugar, about 5 minutes.  Crush (I used an immersion blender after the girls finished having fun smooshing).  Bring to a boil, stirring constantly, 3 minutes.

2. In a small bowl, sprinkle gelatin over cold water.  Let set 1 minute. Add to berry mixture and heat, stirring until gelatin is dissolved, about 3 minutes.

3.  Let jam stand 5 minutes.  Skim off foam, ladle into jars.  Let jars cool before freezing.

Jam will keep for one month in the refrigerator and 1+ years in the freezer.

DSC03706

So, after I finished spreading the jam onto the toast, Cozy says in a disappointed tone, “I thought we were making jelly!”  This confused me, because while I know my kid is smart, there is NO WAY she knows the difference between jelly and jam, so I said, “Huh?  This is jelly!”  I half expected her to school me on what exactly constitutes jelly vs. jam, but she just said again, “No, I meant JELLY.  This is not jelly.”  And then it hit me:  she wanted to make Jell-O, not jelly!  Ha ha!  Poor kid!  Life is rough when your vocabulary is still young!

It’s good to be back!


Categories: Freezing, Journal | Tags: , , , , , , , ,

Freezer Peaches and Grandma Pat’s Pork Tenderloin with Peach BBQ Sauce Recipe

DSC02856I’m a peach girl.  I was actually born a Georgia Peach, although we moved to Ohio when I was two, so if it came down to any sort of loyalty battle, I’d claim Ohio as “my” state.  Regardless, my favorite pie is peach, and nothing smells as wonderful to me as a fresh peach!  Except maybe a baby’s head.  Or pizza.  Or french fries.  Ok, fine, lots of things smell wonderful to me.

Anyway, my Dad scored me some free end-of-harvest peaches at the local farmer’s market.  Out of three 5-gallon mostly-rotten peaches, I rescued about 4 tiny pints worth of delicious, very ripe peach chunks.  While I could have canned them, I have five little kids needing my attention today and I just wanted to be done with them.  So I packed them into freezer containers.  (Side note… I’m not all that impressed with Ball’s freezer jars – even their newest model.  They are just not easy to use because the lids on both models are so finicky!  And I can’t trust myself to freeze the glass canning jars anymore because I’ve managed to break three or four already, either over-filling them or putting them in the freezer while the contents were still hot.  What can I say? I learn the hard way.)  Instead of using syrup, which would have taken additional time to prepare, I just packed them with filtered water and stuck them in the freezer.  Done.

What to do with these in the future?  My Grandmother-in-law has a FANTASTIC recipe for a barbecue peach sauce that is served with pork tenderloin.  It’s a little involved, but it’s so totally worth it.  I would have just made the peaches into this sauce but I don’t have all the ingredients on hand.  And it would have taken more time.  And I wanted to be done.

This is an excellent meal for company, parties, or Tuesday night dinner!  🙂  There’s two options:  one that prepares the meal to be served out of a crockpot (ideal for the party scene), and another one that uses the grill and make a more impressive centerpiece (ideal for company).  I’ve tried it both ways and found them equally delicious!

Grandma Pat’s Pork Tenderloin with BBQ Peach Sauce

Ingredients

Sauce

  • 4 oz bacon, chopped
  • 1 dried Chile de Arbol (halved)
  • 1 cup chopped onion
  • 2 garlic cloves, minced
  • 1 Tbsp Worcestershire sauce
  • 1/2 Tbs peppercorns, crushed
  • 2 small peaches, diced
  • 1 cup orange juice
  • 1 cup ketchup
  • 1 1/2 Tbsp (or more) lemon juice
  • 1/2 tsp hot pepper sauce

Pork

  • 3lbs pork tenderloin
  • 2 Tbs olive oil
  • 4 tsp pepper
  • 4 tsp kosher salt
  • 2 1/2 tsp garlic salt

Directions

For sauce: Saute bacon and chili in large saucepan over medium heat until bacon is crisp.  Add onion and garlic, saute 5 minutes.  Add Worcestershire sauce and peppercorns, stir 1 minute.  Add peaches, saute until translucent, about 5 minutes.  Add orange juice, ketchup, lemon juice and hot pepper sauce.  Simmer until sauce thickens enough to coat spoon thickly, stirring often, about 30 minutes.

For pork: Brush tenderloin(s) with oil to coat.  Arrange park on rimmed baking sheet.  Mix pepper, salt, and garlic salt in small bowl to blend.  Sprinkle over pork. Bake pork at 350* for 30 mins.  Slice pork into 1/2 inch slices.  Transfer to slow cooker, add sauce, cook on low for 1 hr.

OR Grill tenderloin(s) until brown and meat thermometer inserted into center registers 140*, turning occasionally with tongs, about 18 minutes.  Brush pork all over with some of the sauce, about 3 minutes longer.  Transfer pork to work surface, let rest 10 minutes.  Rewarm sauce in pan.  Cut pork crosswise on slight diagonal into 1/2 inch slices.  Arrange pork slices on platter.  Drizzle with sauce, serve, passing remaining sauce separately.

Note: Chile de Arbol is a long, thin red chile that you’ll find in the fruit/veggie section of some grocery stores.  (I probably found mine at Kroger or Giant Eagle)

Next time I make this I’ll try to remember to take a picture of the finished result!

Categories: Freezing, Fruit, Pork, Recipes | Tags: , , , , , , ,

Better Than “Better Than Bouillon” Chicken Base

Chicken Base!

Chicken Base!

It’s here!  I know you’ve been breathlessly waiting for this post!  Or not.  Pretend for me anyway?

Actually, I made this about a month ago.

But then I turned 30 and people threw me a party and gave me a beautiful brand-new road bike and I’ve been gazing longingly at it for a week straight now.  I even took it out for a spin, but the country winds and 20-degree chill encouraged me back home to my warm living room where I could resume gazing:)

Don't judge my outfit...I live in the country!  No one sees me unless I put pictures of myself on the Internet...oh, wait...

Don’t judge my outfit…I live in the country! No one sees me unless I put pictures of myself on the Internet…oh, wait…

Anyway, I mentioned on this podcast that I wanted to learn how to make my own chicken base.  Since then, hundreds of people (ok, one person) have asked me if I’ve made it yet, so I’m happy to report that I have!  And it’s pretty easy to do!

Disclaimer- sorry about the terrible pictures…  I lost my camera for about two weeks and had to use my iPod to take pictures.  Fortunately, my husband found my camera, and it turns out it was right where I left it.  In the last place I looked.  (All those childhood memories of Mom saying those things coming back to you yet?  I have more!)


Chicken Base

Read through the directions first!  You need to refrigerate the stock before adding all the veggies!

What you will need:  (Recipe can be doubled)

  • one whole chicken 
  • 2-3 sticks of celery, chopped
  • 1/2 – 1 whole onion (or onion salt if you forgot to buy onions…), chopped
  • 2-3 carrots, chopped
  • salt
  • pepper
  • garlic salt
  • turmeric
  • stick blender or food processor

Directions:

  1. Place rinsed whole chicken in large stockpot, cover with water so the water is about 1-2 inches above the top of the chicken.  Bring to a boil, then simmer for 45 minutes or until chicken is completely cooked. 
  2. Remove chicken to cutting board.  Allow to cool slightly, then remove all meat from bones, returning bones to stockpot.  If possible, snap some of the smaller bones in half so the bone marrow will cook into your stock!  I know it sounds gross, but it is very good for you! Reserve chicken meat, you will be adding some of it back in at the end.
  3. Boil the bones for another 30 minutes or until they are “clean” (nearly no meat left on them at all).  At this point, the easiest method for removing all the bones is to strain the broth into a new, smaller pot.
  4. Refrigerate stock overnight.  Once completely cooled, the fat will rise to the top and you can easily skim it off.  Return to stove, bring to a boil.
  5. Add celery, onions, carrots, salt and pepper to taste (like 1/2 tsp of each, you can add more later), turmeric to color.  (By color, I mean add it until your broth is a nice yellow color that looks attractive to you.  Or don’t add it at all if those things don’t matter to you.  Personally, a yellow broth tricks my brain into thinking it’s gourmet.  I know that’s weird, but who am I to argue with my brain?)
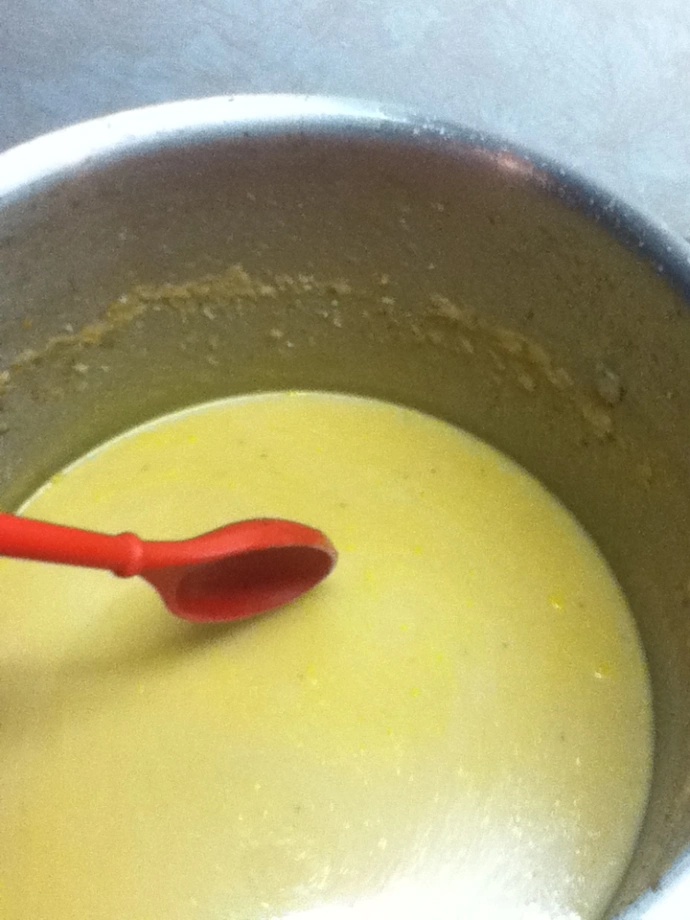
  6. Now the boring fun part.  Bring stock to a boil, then reduce heat so it is boiling gently, not too hard.  Now walk away and find something else to for an hour while your stock reduces.  This amount of time will depend heavily on your broth-to-vegetable ratio.  The more broth you have, the longer this will take to reduce, of course.  Once your stock has reduced to about half, add 1 cup of chicken meat back in.  Using a stick blender (also referred to as an immersion blender) or transferring your stock to a food processor, puree all ingredients.  If your base is still thin, continue to gently boil until it is reduced to the thickness you desire.  You could also add more chicken and puree that in, as that will also increase the consistency as well as the protein content!

Whisking in ClearJel

A couple of notes:

  • I added the vegetables after the bones were drained so you wouldn’t have to try to fish all the bones out amongst the veggies.  Since it needs to reduce anyway, there’s time for the veggies to cook down.
  • I added the chicken last after the first reduction because I believe overcooked chicken isn’t going to make this taste all that amazing.
  • You will probably need to add more salt at the end.  When you taste it, it should taste way too salty.  Keep in mind that you are adding this to water or broth to enhance the flavor of your soups!  (It’s also a sneaky way to get picky eaters to eat veggies and chicken!)
  • I looked everywhere on the Internet for chicken base recipes, and didn’t find anything very specific, so this is very unscientific, of course!  I did read somewhere that cooking the bones too long will also result in an undesirable taste, I have never stumbled upon that misfortune though.  But I thought I’d warn you.  Probably cooking them just until all the meat falls off is sufficient.
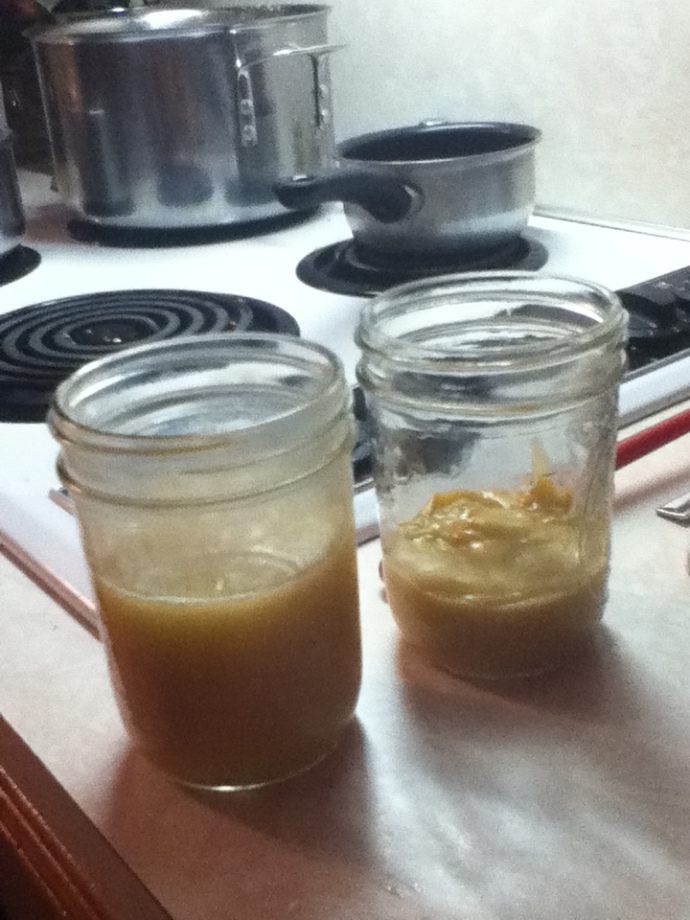
  • I was going for a very similar product to Better Than Bouillon, because that’s what I buy and like.  I could not get it to the exact consistency to BTB, so I tried adding ClearJel to some of it to experiment (because at that point I was still planning on canning it, and you can use ClearJel to can with, unlike cornstarch).  I do not recommend this to you because while it did thicken it to the consistency I wanted, it also deadened the taste substantially and I had to add a lot more salt than I would have preferred.  The rest of my base that I did not thicken with ClearJel, while thin, did not require as much added salt to achieve the taste my family likes.  The next time I make this, I will add more chicken, which will help it be closer to the BTB consistency I so desire.  The nice part about that is you can always add more and more chicken since it’s the last thing you do!  (I don’t know why I didn’t think of that when I was cooking it.  Hindsight. 20/20. ‘Nuff said.)
Base with ClearJel on the right - Just to show consistency differences

Base with ClearJel on the right – Just to show consistency differences

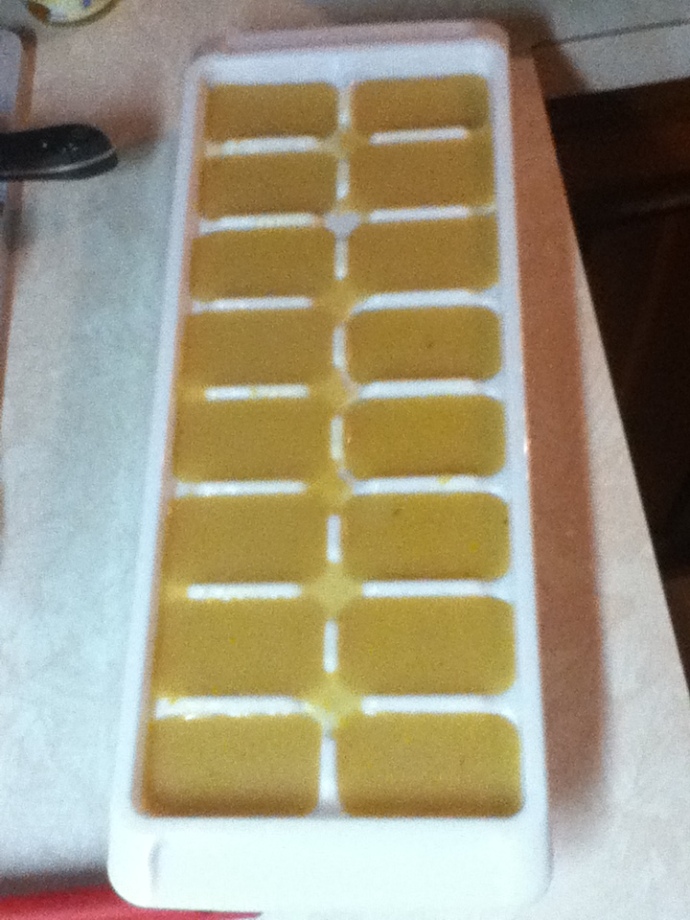
  • I ended up freezing my base into ice cube trays rather than canning it.  I still plan on canning it in the future, I just ran out of desire to spend any more time in the kitchen this particular day.  The ice cube tray method works perfectly though, and is just as convenient as canning it, I think.  To use it, I just add one or two cubes to my soups and they melt right in!  It’s pretty cool, actually, and I feel a little bit like a genius.  I can see the Pin now:  “One ice cube tray of chicken base equals 8 quarts of broth!”  Or whatever.  Pinterest is annoying.  And cool.  I’m annoyed by all the make-your-life-easier stuff on it and yet I’m wildly addicted to it.  I need a Pinners Anonymous Group or something.  PAG.
  • I’m in a weird mood today.
  • Your base may have turned out differently than mine.  You will have to play around with experimenting to find exactly what your taste buds like.  Start with one cube per quart, and if that isn’t flavorful enough, add another one.  I actually added up to 4 cubes to one soup I made where I had started with water!  If you start with broth, you’ll need less base.
About 2 cubes will flavor 1 quart of water (4 cups) for delicious Chicken Soup!

About 2 cubes will flavor 1 quart of water or broth (4 cups) for delicious Chicken Soup!

Categories: Freezing, Low-Acid, Poultry, Soup | Tags: , , , , , , , , , ,

Orange You Glad I Didn’t Say “Banana”?

Knock knock…  Who’s there?

Banana.  Banana Who?

Knock knock…  Who’s there?

Banana.  BANANA WHO?

Knock knock…  WHO’S THERE?

Orange.  Orange who?

Orange you glad I didn’t say “banana”?

I’m sorry.  I have a 4-year-old and a 1-year-old.  This is my life, people.  And for two days, so was bananas.  My Dad dropped off an entire case of bananas the other day, and they were so ripe that I had to immediately address them, otherwise I was going to be reduced to making 10,000 loaves of banana bread.  Not that I don’t love banana bread as much as the next housewife…  I just don’t need a year’s supply of it.  After all, zucchini bread wants some attention too.

Anyway, I had a lot of bananas, so I got online and looked up as many recipes for bananas that intrigued me as I could.  I’m going to share just the recipes and pictures of the finished products because both you and me have lives outside of bananas, regardless of what the bananas want you to think.

Let’s begin:

Canning

Banana Butter 

This is really delicious and I plan on giving these as Christmas gifts!  I thought it was tasty on toast, and I think it would also be delicious in a peanut butter sandwich!  Here’s a link to the recipe and canning instructions:  Banana Butter Recipe

Dehydrating

Honey-glazed Banana Chips

These were really good!  And very easy to make.  Simply whisk up a glaze with 1/4 cup of honey and 1/4 cup of water.  Slice the bananas 1/4″ thick into the glaze, stir them around a bit and lift them out with a slotted spoon.  Place on trays and dry for 6-10 hours.  You could also sprinkle a little cinnamon into that glaze!

Banana Leather

Here’s the key ingredient to making fruit leather:  GREASE THE SHEET!  Sheesh.  That little tidbit was kind of hidden in my book of dehydrating recipes, and that kind of knowledge doesn’t come naturally to me, so this is what I got the FIRST time I made this:

Uh, yeah.  My fingernails hurt so bad by the time I finished peeling this off!  The SECOND time I made this, I used a dab of coconut oil and spread it around the Fruit Roll Sheet with a paper towel.  Then I pureed the bananas in a food processor until they were liquified, then spread it over the Fruit Roll Sheet.  It took about 8 hours to dry (until there are no longer any sticky parts).  Then it peeled right off!  I forgot to take a picture of that, but you can see it all rolled up and wrapped in plastic in the top picture.  (For the record, no one in my house was that excited about “banana leather”.  If I ever make it again, I think I’ll add a few other fruits to it.)


Freezing

Banana Smoothie Cubes

These are super easy to make.  Just slice bananas into about 1″ chunks, lay flat on a baking sheet, and pop the sheet into the freezer until the bananas are completely frozen.  Then transfer them to a freezer-safe bag or container and label them!


What to do with these?  Add them to any smoothie!  Start with frozen banana chunks in the blender with a little milk.  Add other fruits for a fruity smoothie, or some peanut butter for a good workout recovery smoothie, or some chocolate syrup, whipped cream and a cherry for a dessert!  Thanks to my sister-in-law, Erin, for that last one!  Yum!

Baking

Peanut Butter Banana Bread with Chocolate Chips

As it turns out, I made this last and then found myself wishing I’d made 10,000 loaves of it and that lifetime supply!  *Ding ding diiiiing!*  We have a winner, folks!  This was, hands down, the BEST banana bread…wait…the best BREAD I’ve ever eaten (or made) in my life.  I took it to a family get-together this week and it received rave reviews from everyone!  (Click on the link above for the recipe!)   I can’t believe I forgot to take a picture of this, but Linda’s pictures are better than mine could ever be anyway.


Well, there we have it.  Enough uses for a banana to fill your week!  (How many times did I write the word “banana”?  I’m tired of that word!)

Categories: Canning, Dehydrating, Freezing, Fruit, Leftovers | Tags: , , , , , ,

Basic Tomato Sauce and Condensed Tomato Soup

I’ve been making my own tomato sauce for several years now and have gotten into a certain…rhythm.  It’s not a difficult process, per se, but it is time consuming and extremely messy.  So messy, in fact, that the first time I made tomato sauce as an adult (without the tutelage of my wise mother) I swore I would never put myself through such an ordeal again.   My kitchen was a disaster and my sauce turned out thin and uninspiring.  In fact, I didn’t even use some of the quarts I had canned because looking at them brought back such unpleasant memories!   (Who says cooking isn’t an emotional experience?)

Those days are gone.  I’ve trial-and-error’d tomato sauce to a Chelsea Perfection: a rhythm I am pleased with, and a product I am thrilled with.  There is no need to blanch and peel the tomatoes, and all you need is a food processor and a strainer!

Step 1 – Choosing Tomatoes:  Choose the right kind of tomatoes!  If you can, use at least 50% of your batch with Romas.  They are small but meaty, and will give you the consistency of sauce you desire.  I like to blend 3-4 kinds of tomatoes to get the best flavors.  This year I planted and harvested Romas, 2 kinds of Heirlooms, and Better Boys.  Or Big Boys.  Or Early Girls.  I can’t remember.  I’m not sure it matters.  They’re red and if you let them get very ripe on the vine they have an amazing flavor…or so claims my husband.  I hate raw tomatoes, but adore all tomato products.  I know, I’m weird.

Step 2  – Preparing Tomatoes: Wash the tomatoes, slice in half, and cut out any blemishes, spots, cracks and the cores.  I then quarter them, and throw them all into a stainless steel pot.  According to the Ball Book of Home Preserving, “the acid in tomatoes can react with aluminum, copper, brass, galvanized or iron equipment, creating bitter flavors and undesirable colors”.  Turn the heat on medium, and cook them down into a mush.  Sometimes I even take a potato masher and make sure the chunks are practically liquified.  This isn’t totally necessary, but it does help to speed the process up a little.

Step 3 – Process and Strain: Here comes the messy parts!  I set up a work station like this:

Tomatoes in pot on stove (yes, I realize this is not a stainless steel pot. I’m a rebel.), next is food processor, next is the pot sauce will get strained into, then a waste bowl for the seeds and skins.

Once the tomatoes are completely cooked down, and resemble sauce more than whole tomatoes, break out your food processor.  Ladle a few cups of mush into the food processor and blend for several seconds.  Then transfer the liquid to your strainer.  Jiggle the strainer a bit to get all the juice through, then – with moderate force – bang the strainer down on the edge of the bowl to encourage the sauce through.  This doesn’t take very long, less than a minute.  There is no need to use a spoon to force it through, just do a variety of bang-bang-jiggle-jiggle’s on the side of the bowl.

Bang-Bang-Jiggle-Jiggle!

Once all the sauce is forced through the strainer, all that is left is the skins and seeds!

Step 4 Reduce Sauce:  Once all the mush has been processed and strained, return the pure sauce to the pan.  I usually rinse or wash the pan first, to make sure there aren’t any rogue seeds left in there.  Now assess your sauce.  Is it already the consistency you desire?  If so, you are ready to can, freeze or use it.  If it’s still a little thin then you want to reduce it.  Reduce is a word that the meaning of which eluded me the first time I made sauce.  What reduce means, in the cooking world, is to bring your sauce to a boil, then turn the heat down to a simmer, and let the sauce simmer for some time until the amount of sauce has decreased.  What happens during this time is that the juice evaporates, and the overall quality of the sauce thickens.  Depending on the type of tomatoes you use, sometimes you need to reduce your sauce by half!  (Meaning, you will get 2 quarts instead of 4!)  Try not to let this discourage you, as it did me at first.  You will be much happier with a thicker sauce when the time comes to use it, and even though it seems frustrating to “lose” half your sauce, you really want a nice, thick sauce in the end.

So anyway, if you need to reduce your sauce, do it now.  This might take an hour, so be patient.  Keep the heat on simmer and stir occasionally.  I usually need to reduce my sauce by a third, using the 3-4 kinds of tomatoes that I use, and it takes about 45 minutes to an hour.

Your finished product is a pure, no-additives, nice, thick tomato sauce from scratch!  At this point, you can use it, transfer it to freezer-safe jars or bags (you should let it cool first!), or you can can it.

Step 5 – Clean your kitchen!  Messy stuff, eh?

Canning Tomato Sauce

How much sauce you will yield will depend on how many pounds of tomatoes you started with, and how much you needed to reduce your sauce.  It’s highly variable.  I usually get about 3 quarts out of a full large stockpot of quartered tomatoes.  You will really have to play it by ear and hold off on preparing your jars and lids until your sauce is done so you can eyeball it and see how many jars you will need.

See the canning process for a boiling-water canner here, (you can also pressure can tomato sauce…more on that at a later date!) adding these steps:

  • Tomato products need bottled lemon juice added.  Add 1 tablespoon to pints and 2 tablespoons to quarts.
  • Process pints for 35 minutes and quarts for 40 minutes.

Jars acclimating to room temperature

Condensed Tomato Soup

Makes 4 pints.

In my quest to rid my cupboards of Campbell’s (*sniff* I love Campbell’s!), I needed to come up with a condensed tomato soup version.  I could just make a delicious tomato soup and freeze it like a normal person, but normal people think ahead and pull stuff out of the freezer the day before they want it.  I never know I want tomato soup until about 10 minutes before I HAVE to have it, so freezer soup isn’t gonna cut it!  There’s also that tricky problem that you’re not really supposed to can anything with thickeners or dairy due to heat’s inability to penetrate those types of fat for safe consumption.  SO, I’m shooting for a product very similar to Campbell’s Condensed Tomato Soup.  Open jar, add milk, microwave.  Yum.  Here’s what I came up with, and it’s shockingly easy.

What you need:

  • 8 cups tomato sauce
  • 2 tablespoons sugar (more or less to taste)
  • 1/2 teaspoon garlic salt
  • 1 teaspoon salt
  • bottled lemon juice

Directions:

1. Bring sauce to a boil, add sugar.  Add 1 tablespoon of lemon juice to each pint.  Follow these basic steps for canning with a boiling-water canner, and process pints for 35 minutes.

2. When ready to use, open jar and dump into bowl.  Add half a pint (1 cup) of milk, and warm on stove or in microwave.  I usually add shredded cheese to my soup (I like a lot of cheese.  Like, a ridiculous handful.  And I wonder why I’m chubby.)  Serve alone or with grilled cheese sandwiches!  (No, the grilled cheese sandwiches do not always replace the insane amount of cheese I put in my soup.  I have problems.)

The Verdict:

It tastes very similar to Campbell’s!  It’s a little more tangy, which I like.  I am absolutely thrilled to be able to have the convenience of canned soup that tastes almost exactly like the real thing without all the cons – BPA, high fructose corn syrup, etc.  It’s a keeper!

Categories: Canning, Freezing, High-Acid, Soup, Tomatoes | Tags: , , , , , , , , , ,

Wedding Soup with Arugula

I was first introduced to Italian Wedding Soup at Sebastiano’s,  a delicious local restaurant in Toledo, Ohio.  It was a huge step toward “adventuresome eating” for me back then, in my picky days.  A step my stomach has oft thanked my brain for, if not my thighs.

I had to have easier access to this soup from then on.  My first attempt at Italian Wedding Soup failed pretty miserably.  Not only did my bland homemade meatballs cause my husband to put on his pretend “yummy!” face, but I also added beef broth where I should have added chicken.  Yeah, it was bad.  I tinkered with online recipes for awhile, coming close to Sebastiano’s delicious creation but gradually becoming weary of how time consuming it all was.

And then I struck gold.  Polish gold.  It all began one steamy August day, where our thoughts and actions were consumed with the task of painting our massive giant deck on our previous house.  We were preparing the house to sell it, and begged invited some good friends to come over and help us paint and simultaneously celebrate Ty’s birthday.  If our charm and good looks didn’t convince them to come do manual labor, then the out-of-this-world amazing kielbasa from Stanley’s did!  So we painted, cooked, laughed, and enjoyed each other.  It’s amazing what kielbasa can get people to do!

Stanley’s kielbasa from Toledo, Ohio, is hands-down, the best kielbasa ever. Don’t be intimidated by their location…it’s so worth it!


Fortunately, we over-purchased kielbasa.  I was faced with an unexpected challenge.  What to do with leftover kielbasa?  Has such a thing ever happened before?  Then it hit me:  Soup.  Wedding Soup.

The first batch was good…REALLY good.  I made it with spinach, because it was all I had, and because I didn’t know better.

The second batch was epic.  I made it with arugula this time, and ever since then it has earned it’s place in my freezer as a go-to meal for chilly nights.  Or steamy August nights, if the taste buds demand it.

The best part is, you won’t believe how easy this soup is.  However, since we’re borrowing the main ingredient from Poland, I don’t think we can truly call it “Italian Wedding Soup”.  (Can we call it “Chelsea’s Wedding Soup?  🙂 )  But since I insist that you use Acini de Pepe noodles, you can’t really call it “Polish Wedding Soup” either.  So let’s call it what it is, a beautifully blended mix of history, ethnicity, and love from the kitchen.

American Wedding Soup

What you will need:

  • 1 quart chicken stock or broth
  • 2 cups arugula (more if you like it peppery…more is better)
  • 1/2 onion, diced
  • 2lbs uncooked kielbasa
  • 1 cup uncooked Acini de Pepe (or orzo, if you can’t find the AdP)
  • chopped carrots and celery – optional
  • 1tsp chicken base – also optional, but I always use it.
  • fresh Parmesan – not really optional.  You’ll want it.

Directions:

Fill a large stock pot (4-6 quart size) with your chicken stock.  Place the onion, carrots, celery and uncooked kielbasa in the broth and bring to a boil.

When the kielbasa start to float (around 15 minutes), pull them out, reduce broth to a simmer, and slice them into 1/2 chunks on a cutting board. Meanwhile, in a separate pan, bring 4 cups of water to a boil and cook pasta al dente.  (7 minutes)

It’s okay if there’s still some pink, it’s going to finish cooking in the pot.  Return to broth.  Tear arugula in halves or quarters and add to broth, bringing broth back to a low boil.

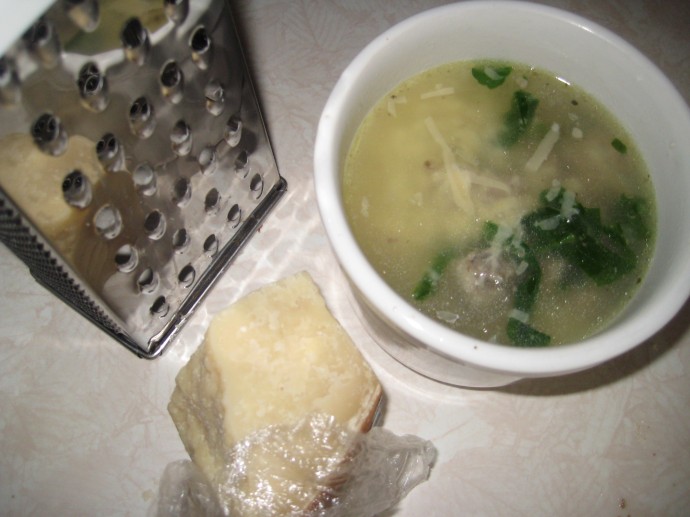
When the arugula is no longer bright green and looks somewhat wilted, add drained pasta.  Boil for 3 more minutes or so, check some of the kielbasa chunks to make sure they are cooked through.  Taste test: if it’s still slightly bland, add some chicken base until it reaches the appropriate level of saltiness.  Then serve!  Top with freshly grated Parmesan cheese for an added Wow!

It may not be authentic, but it’s authentically good.

Man, that was cheesy.  Good thing I like cheese!

Someone make me stop!

P.S. You can freeze this soup nicely, even with the noodles in it, although admittedly it’s always better to add the noodles fresh.

P.P.S. If you’ve never been to Sebastiano’s, then you haven’t lived.  There isn’t a bad thing on the menu!

Categories: Freezing, Leftovers, Soup | Tags: , , , , ,

Tomato Basil Soup from Actual Tomatoes

I’ve never made my own tomato soup before.  I have, however, consumed approximately 8,000,000 cans of tomato soup over the last 2, almost 3 decades.  I’m sure that’s not much of an exaggeration, either.  It’s kind of ironic how much I love tomato soup and all tomato products because until recently, I wouldn’t touch a raw tomato with a 10-foot pole.  I’ve since matured drastically in a culinary sense (I’ve even started eating mushrooms!  Gasp!) and no longer sneer at tomatoes, even gone as far as ceasing to pick them off of menu items.  So lately it’s occurred to me that it’s high time to finally make my own tomato soup, for once and for all.

Are you starting to worry that this is becoming more of a blog on soup than it is on preserving?  Me too.  I have an addiction!

But in my defense, it was a pretty crappy day.

No sun in sight.  Rain, dreariness, inside activities.  All signs that point toward soup.

Okay, here’s the scoop:  Everyone has a thing, right?  Well, I go in phases.  I guess you could even say phases are my thing.  The phase I’m going through right now is that commercially canned foods are from the devil because of BPA, even though I’m not even entirely sure what BPA is or why it’s from the devil.  (You can read the link, but if you’re like me all you’ll get from that is “don’t eat it, it’s from the devil”) But whatever, that’s my thing.  So anyway, the point of telling you that is because I had a really hard time finding tomato soup recipes that were truly from scratch.  They all used canned tomatoes, which are apparently some of the worst offenders for the whole BPA thing, so obviously I don’t want to use them.

So here’s a quick tutorial on making tomato sauce.  We’ll revisit this in about a month when the tomatoes are in season, but they’re pretty cheap in the stores right now anyway, so maybe this is useful information now!

Tomato Sauce (makes about 1 quart)

What you will need:

  • 8 big juicy tomatoes, like beefsteak or big boys
  • 8 Roma tomatoes
  • a strainer
  • a food processor
  • a pot
  • a plethora of paper towels or a heavy duty sponge

Directions:

The first step is to wash the tomatoes.  Next, we’re going to blanch them to remove the peels easier.  You do this by bringing a pot of water to a boil.  For the larger tomatoes, you might want to cut them in half, but it’s not necessary.  Just a little easier.  Once the water is boiling, you carefully place the tomatoes in the water for about 30 seconds to 1 minute.

Then remove them, and with a tongs or a fork, peel the skin away.  It should peel away without much effort.  If it’s still sticking, return the tomato to the boiling water for another 30 seconds. You can technically skip this step since we’re going to strain the tomatoes anyway, but I think it makes straining so much easier to get rid of the peels first.

Next, empty the water from the pan, cut up the tomatoes into halves or quarters and return them to the empty pan.

Heat, stirring often, over medium-high heat for 10 minutes, or until they look like this:

This is when I start salivating, and my husband – who worked in a tomato factory as a teen – leaves the house.  Once the tomatoes have boiled down to a chunky sauce, turn the heat off and bring out the food processor.  Load up the food processor and puree the tomatoes. Depending on the size of your processor, you may need empty and re-load to process all the tomatoes.

Now it’s time to strain out the seeds!  The best way I’ve found to do this is by using a strainer.  (Go figure) Ladle one or two scoops of puree at a time into the strainer, and hold over an empty bowl or pan.  BANG the strainer on the bowl to get all the “meat” through.  This is much faster and more effective than pressing the puree with a spoon.  It does make a little bit of a mess, but that’s what the sponge is for!

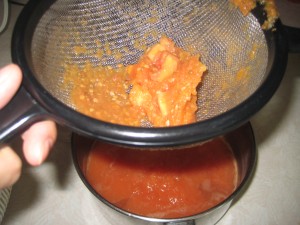
This is what the strainer should look like after you’ve smacked all the meat out of it:

Just the seeds and whatever didn’t boil down is left!  All the good saucy meat made it through!  Once you’ve done this to all of the puree, return the sauce to the stove and bring to a boil.

Now, from this point, if you just want sauce, you’ll bring to a boil, reduce to a simmer for about an hour until the sauce is the consistency you prefer.  From here you could can the sauce or freeze if you aren’t going to immediately use it.

But since we are going to immediately use it, go ahead and let it simmer down for 30 minutes or so, or until it’s thicker than a soup consistency.  Now we make soup!  I used this recipe for the base of my soup.

Tomato Basil Soup 

What you will need:

Directions:

Follow the directions from the above link, substituting the tomato sauce for the cans of tomatoes.  Add the cheese to the soup at the very end while the soup is simmering hot and allow it to completely melt and become one with the soup.  It really adds a heartiness and amps up the “comfort” level (aka, calories…) of the soup!


The Verdict

It turned out really good, although in typical Chelsea fashion it was a little trial by error.  I started with only about a pint of sauce so it wasn’t a rich enough “tomato” flavor for me, but once I added more sauce I liked it.  You can skip my sauce and just make it with cans of devil tomatoes like the recipe calls for, which is probably more accurate than my rendition.  We got several meals out of this!  The first meal was served with a hunk of homemade bread (which I almost burned, but still turned out pretty good), another meal was served with lemon cream pasta (which I added sauteed garlic too…a must!), and the last meal was served on this rainy June day with…duh…grilled cheese!  As I was making grilled cheese I got feisty and threw some cheddar into the soup as it was heating up (Ok, I’m lying.  It wasn’t cheddar.  It was fake plastic American cheese.  Also from the devil, but somehow not a part of my current thing.) and that made all the difference in the world!  Now imagine if I had used real cheddar!  That didn’t surprise my husband at all when I did that because I’m well known for adding half a block of shredded cheese to my tomato soup. So rather than make you discover this happy pairing by perchance, I figured I’d just add it to the recipe.

An Important Afterthought

Oh yeah!  This is a food preservation blog… I keep getting distracted by recipes and the actual consuming of the food!  If you want to make up a bunch and pressure-can it, do not add the cream.  That has to be added as you heat it because it’s not recommended to can dairy.  If you choose to can this soup, process quarts at 10 lbs pressure for 30 minutes and pints for 25 minutes.  You could also eliminate the carrots and chicken broth and can it in a water-boiling canner, processing quarts for 40 minutes and pints for 35.  Either way, pressure-canned or water-boiled, you do need to add 2 Tbsp to quarts and 1 Tbsp to pints of bottled lemon juice (fresh squeezed lemon juice doesn’t contain the appropriate amount of acidity). If canning is not for you, you can always freeze it!  I ended up adding the cream to mine and freezing it, because as a life-long yo-yo dieter I just don’t make a habit of keeping cream in the house, so I wanted to use it all before it a) went bad or b) tempted me to dip chocolate chip cookies in it.

Cheers!

Categories: Canning, Freezing, High-Acid, Soup

Freezer Foods: A Borrowed List

Pinterest is such a great resource.  Like Facebook, Blu-Ray and smartphones, it’s one of the many technological advances that I resisted inviting into my life and later regretted waiting so long to do.  I’ve only been “on” Pinterest for a few months now, but have already discovered so many clever ways to do different things, or ways to turn mundane household items into something life-enhancing.  Mostly I just “pin” these ideas, store them away for a day when I’m staring at a wall with nothing to do.  It’s hard to imagine such a day exists!  But my favorite thing about Pinterest so far is all the really, super cool blogs it has lead me to!  I saw a pin for foods that can easily be frozen and checked it out.  It lead me to Andrea’s blog, Simple Organized Living, where I stayed, fascinated, for the next hour and ravaged her blog.  She covers a range of topics from organization to frugal living and homemade natural cleaning products as well as some other topics.  I recommend checking it out!  For now, here’s the gist of her post on freezing foods:

Freezable Foods

  • Breads
  • Baking Supplies
  • Dairy
  • Fruits
  • Herbs and Vegetables
  • Meals (Soups, Casseroles, Meats)

Click the link above to read explanations on how to freeze these foods!  I would say from my own freezing experience so far, I don’t care for the taste of some bread, especially buns, that come from the freezer.  A loaf of store-bought bread seems to be fine, but buns for some reason just taste stale to me.  I would also say that when I made meals ahead of time and freeze them, I usually just freeze the protein/sauce of the meal, and add the carbohydrate, like noodles or rice, later.  Grains freeze just fine in soups or sauces, but if they’re just resting underneath a sauce and not mixed in, they don’t taste as good as when made fresh.  That’s really just my own opinion, though!

Also check out this follow-up post:  Freezer Cooking FAQ’s.  Really good stuff!

And if you haven’t checked out Pinterest yet, don’t put it off any longer!  It’s not just for women, either.  It is basically Google Images, except easier to navigate.

Anyone else have any really good freezer recipes?  Also, anyone want to enter into a cheerful debate on upright freezers vs. chest freezers?  I have an upright that came with our house and love it, but have heard some good arguments for chest freezers as well.

P.S. Anyone else notice that Andrea uses {these} instead of (these)?  I was immediately drawn to the “pretty parentheses” so don’t be surprised if you start seeing MY blog graced with those.  😉

Categories: Freezing

Condensed Cream of Chicken Soup

Part of my quest in canning is to eliminate all commercially canned items from my pantry.  A big one, especially around any of the winter holidays is Campbell’s condensed cream soups.  I mean, who wants to just eat regular old vegetables when you can smother them in creamy goodness and bake every last nutrient out?  Okay, fine, I’ll eat vegetables the way God intended them for most of the year.  But when it’s a holiday, by golly I will make them taste good!  And yes, my birthday counts as a holiday.  So do Friday nights.

This is a pretty good recipe!  It doesn’t taste exactly like Campbell’s, but I would actually dare to say it is better.  It has a richer, more honest flavor.  I did add a little extra salt because we’re so used to Campbell’s, and I am still gradually weaning my family off of a high-sodium lifestyle. I got the recipe from Six Sister’s Stuff.  That link will take you to a delicious recipe, including how to make your own Hidden Valley Ranch spice packet!  I made that the same night as this cream of chicken soup, mixed it together and served it with chicken over rice.  It was pretty tasty, but I want to try their slow cooker recipe with pork chops next.

Condensed Cream of Chicken Soup                                                                            (Yields 3 cups of soup, which is equal to about 2 cans of Campbell’s Condensed Cream of Chicken.)

What you will need:

1 1/2 cups chicken broth*
1/2 tsp poultry seasoning
1/4 tsp onion powder
1/4 tsp garlic powder
1/8 tsp black pepper
1/4 tsp salt
1/4 tsp parsley
1/8 tsp paprika
1 1/2 cups milk
3/4 cup flour (can use gluten free flour)

Directions:
1. In medium-sized saucepan, boil chicken broth, 1/2 cup of the milk, and the seasonings for a minute or two (longer if using fresh onions or garlic).
2. In a bowl, whisk together the remaining 1 cup of milk and flour. Add to boiling mixture and continue whisking briskly until mixture boils and thickens.
*This is especially flavorful if you make your own chicken stock!
I doubled this recipe, used some for dinner that night, refrigerated some more for another meal, and froze the rest!  It’s not recommended to can foods with dairy, unfortunately, because the fat in dairy could encapsulate any bacteria in the product, and even the heat from pressure canning isn’t high enough to permeate it.  That’s fine, just freeze it!  I agree it would be more convenient to be able to can it, but it probably isn’t worth the risk.
Categories: Freezing, Leftovers, Low-Acid, Poultry, Soup

Lemon Chicken Orzo Soup

Since I did not put as much chicken into my quarts as I should have when I canned chicken soup, I had lots of leftover chicken to use up.  This is hardly a problem around here, and when in doubt, into soup it shall go!  I decided to freeze what we didn’t eat to show you an easy way to preserve foods by freezing.  (Ok, truthfully, I hadn’t even cleaned out my pressure canner yet, and was kind of dreading doing so!  It’s heavy!)

Lemon Chicken Orzo Soup

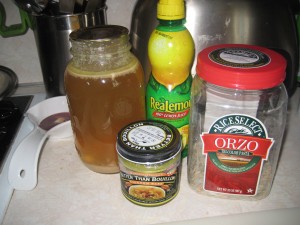
What you will need:

Directions:

Chop veggies and add to pot.  I also added more chicken since I didn’t have enough in my quarts that I canned.                                  

Add the quart of chicken soup and bring to a boil.  Add base, and several handfuls of washed spinach or arugula.  No need to chop the spinach, it will naturally shrivel up to bite-sized pieces in the hot soup!  I’ve made this with spinach and arugula, and I would say the arugula lends a better, peppery flavor.  

In a separate pan, bring the orzo and about 2 cups of water to a boil.  You don’t want to add uncooked pasta or rice to your soup because it will soak up all your lovely stock! 

Cook it in water (or different stock or broth) and add it once the orzo is tender and the remaining water has been drained.

Bring back to a boil, add generous amounts of lemon juice.  I would say it needs about 1/2 cup.  I would start with 1/4 cup, taste it, and decide what it needs.  If it needs more lemon, add more juice.  If it needs more salt, add more base.  Add base by 1/2 teaspoons at a time, because too much base is difficult to fix!  (Learned that on lobster bisque – DOH!) Add a little pepper, and voila!  I served this on our date-night with homemade garlic bread.  (Quick recipe: leftover hamburger buns opened, spread with butter, liberally doused with garlic salt and broiled in the oven at 500 degrees until they’re browned.  Browned, not burnt to a crisp.  I almost always burn them to a crisp.)           

There was enough for four 2-cup servings from this batch.  The girls were off at the grandparent’s house and frankly, after cooking two whole chickens and making tons of soups from them, we are little tired of soup.  (*Gasp!*  I said WHAT?)  Freezing the rest of this soup was a better option!

Here is my favorite way to freeze soups:

Grab a freezer baggie.  I used a quart-sized one.  Write the contents and the date made on the baggie BEFORE filling it with soup.  (Learned that one the hard way, too)

Ladle soup into the baggie, seal it closed as close to the top of the soup as possible to eliminate as much air as you can.  Now for the clever part:  (I’m being a little ironic.  You probably already know this trick, but it took me about 6 years to figure this out.)  Clear a spot in your freezer so you can lay the soup flat.    

Once it is frozen, you can turn it upright and file it neatly under “soup”!  This is a definite space-saver!

I hope you all have a lovely Easter tomorrow!  Don’t fret over all those leftover hard-boiled eggs…  Hang on to them and stay tuned for an excellent way to turn a carton (or cartons!) of color-tinged eggs into finger-lickin’ treats!

I may have staged this shot, but he still loved the soup!

Categories: Freezing, Low-Acid, Poultry, Soup

Create a free website or blog at WordPress.com.