Monthly Archives: June 2012

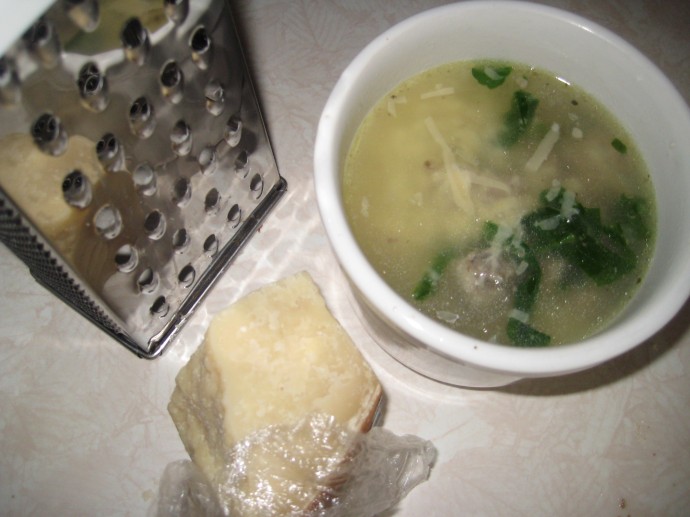
Wedding Soup with Arugula

I was first introduced to Italian Wedding Soup at Sebastiano’s,  a delicious local restaurant in Toledo, Ohio.  It was a huge step toward “adventuresome eating” for me back then, in my picky days.  A step my stomach has oft thanked my brain for, if not my thighs.

I had to have easier access to this soup from then on.  My first attempt at Italian Wedding Soup failed pretty miserably.  Not only did my bland homemade meatballs cause my husband to put on his pretend “yummy!” face, but I also added beef broth where I should have added chicken.  Yeah, it was bad.  I tinkered with online recipes for awhile, coming close to Sebastiano’s delicious creation but gradually becoming weary of how time consuming it all was.

And then I struck gold.  Polish gold.  It all began one steamy August day, where our thoughts and actions were consumed with the task of painting our massive giant deck on our previous house.  We were preparing the house to sell it, and begged invited some good friends to come over and help us paint and simultaneously celebrate Ty’s birthday.  If our charm and good looks didn’t convince them to come do manual labor, then the out-of-this-world amazing kielbasa from Stanley’s did!  So we painted, cooked, laughed, and enjoyed each other.  It’s amazing what kielbasa can get people to do!

Stanley’s kielbasa from Toledo, Ohio, is hands-down, the best kielbasa ever. Don’t be intimidated by their location…it’s so worth it!


Fortunately, we over-purchased kielbasa.  I was faced with an unexpected challenge.  What to do with leftover kielbasa?  Has such a thing ever happened before?  Then it hit me:  Soup.  Wedding Soup.

The first batch was good…REALLY good.  I made it with spinach, because it was all I had, and because I didn’t know better.

The second batch was epic.  I made it with arugula this time, and ever since then it has earned it’s place in my freezer as a go-to meal for chilly nights.  Or steamy August nights, if the taste buds demand it.

The best part is, you won’t believe how easy this soup is.  However, since we’re borrowing the main ingredient from Poland, I don’t think we can truly call it “Italian Wedding Soup”.  (Can we call it “Chelsea’s Wedding Soup?  🙂 )  But since I insist that you use Acini de Pepe noodles, you can’t really call it “Polish Wedding Soup” either.  So let’s call it what it is, a beautifully blended mix of history, ethnicity, and love from the kitchen.

American Wedding Soup

What you will need:

  • 1 quart chicken stock or broth
  • 2 cups arugula (more if you like it peppery…more is better)
  • 1/2 onion, diced
  • 2lbs uncooked kielbasa
  • 1 cup uncooked Acini de Pepe (or orzo, if you can’t find the AdP)
  • chopped carrots and celery – optional
  • 1tsp chicken base – also optional, but I always use it.
  • fresh Parmesan – not really optional.  You’ll want it.

Directions:

Fill a large stock pot (4-6 quart size) with your chicken stock.  Place the onion, carrots, celery and uncooked kielbasa in the broth and bring to a boil.

When the kielbasa start to float (around 15 minutes), pull them out, reduce broth to a simmer, and slice them into 1/2 chunks on a cutting board. Meanwhile, in a separate pan, bring 4 cups of water to a boil and cook pasta al dente.  (7 minutes)

It’s okay if there’s still some pink, it’s going to finish cooking in the pot.  Return to broth.  Tear arugula in halves or quarters and add to broth, bringing broth back to a low boil.

When the arugula is no longer bright green and looks somewhat wilted, add drained pasta.  Boil for 3 more minutes or so, check some of the kielbasa chunks to make sure they are cooked through.  Taste test: if it’s still slightly bland, add some chicken base until it reaches the appropriate level of saltiness.  Then serve!  Top with freshly grated Parmesan cheese for an added Wow!

It may not be authentic, but it’s authentically good.

Man, that was cheesy.  Good thing I like cheese!

Someone make me stop!

P.S. You can freeze this soup nicely, even with the noodles in it, although admittedly it’s always better to add the noodles fresh.

P.P.S. If you’ve never been to Sebastiano’s, then you haven’t lived.  There isn’t a bad thing on the menu!

Categories: Freezing, Leftovers, Soup | Tags: , , , , ,

Garden Update and an Arugula Pecan Pesto Recipe!

It’s growing in nicely!

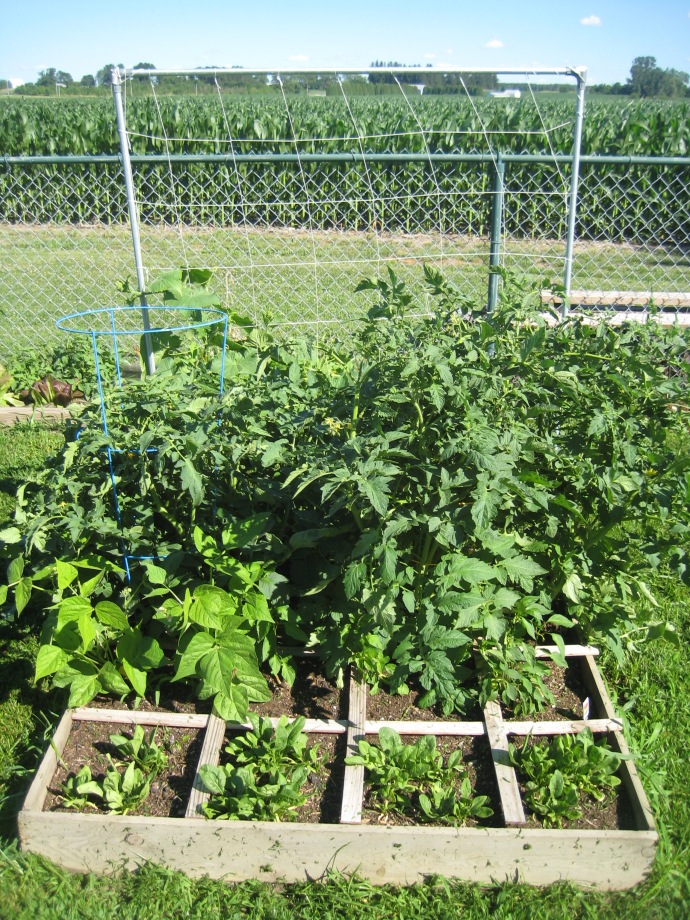
The right box, with cucumbers climbing up the trellis, three tomato plants, one snap pea plant, two green bean plants, three banana pepper plants, and a row of spinach.

So far I am completely sold on Square Foot Gardening.  It is 1000 times easier than row gardening, and truly, weeding is a pleasure!  Besides manipulating the tomato plants up their cages or the cukes up the trellis, pulling the occasional weed in my true SFG boxes is the ONLY maintenance I have had to do.

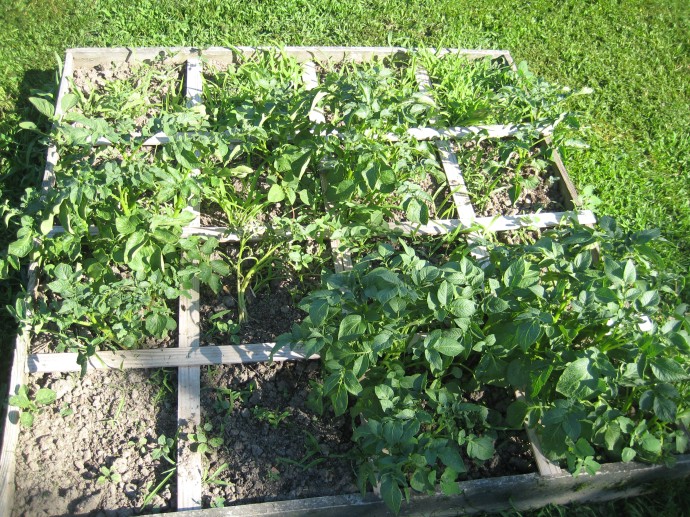
There are red and white potatoes growing here. I still want to get sweet potatoes going, just haven’t gotten around to it yet.

If you are not familiar with Square Foot Gardening, Mel insists that a key component to SFG success is “Mel’s Mix”.  This is a soil mixture of 1/3 vermiculite, 1/3 peat moss, and 1/3 compost.  Mel instructs us to not use our existing garden soil, but instead to create Mel’s Mix ourselves and fill the boxes with it.  My husband was extremely skeptical of purchasing soil components when we live surrounded by fields…using existing soil…growing wonderfully…  I didn’t blame him, but as the only one who does the weeding, I insisted in experimenting.  He agreed that I could fill some of the boxes with Mel’s Mix as long as I left our existing soil in the others.  Anyway, long story just to tell you that the potato box above used our existing soil.  It’s not a great photograph, but I can assure you the 40% of the green is weeds.  I went two days without checking on the garden once and when I walked out there the potato box was completely overrun with weeds!  It was a good reminder to me of last year’s garden – row style, that I lost to weeds.  I am happy to report that this year, however, that the rest of the boxes are 99% weed-free!

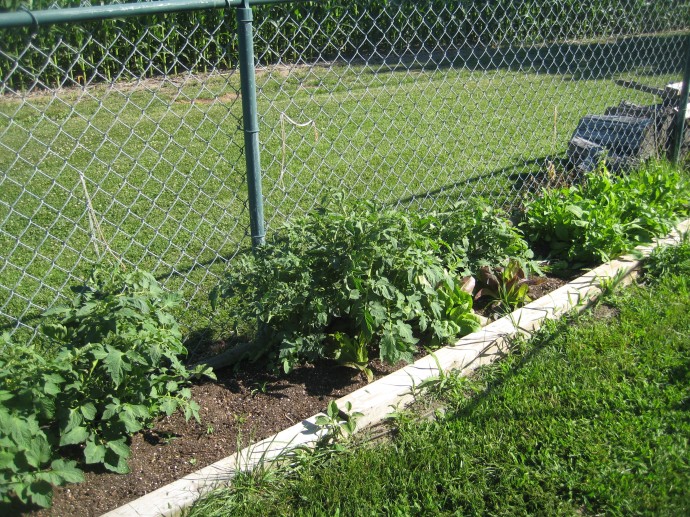
I lost two of my Roma tomato plants, but the other six are coming up nicely. On the far end is an abundance of Arugula, and in the middle are two Romaine heads. I planted Romaine in several spots, but those are the only two coming up.

In this picture the arugula has already been mostly harvested.  Besides basil, it’s the first thing I harvested from the garden!  I was totally shocked with how much arugula came up, and a little bummed by how little Romaine came up.  I plan on planting more soon though, although I’m not sure it will come up in the heat of summer.  Anyone know the answer to that for me?

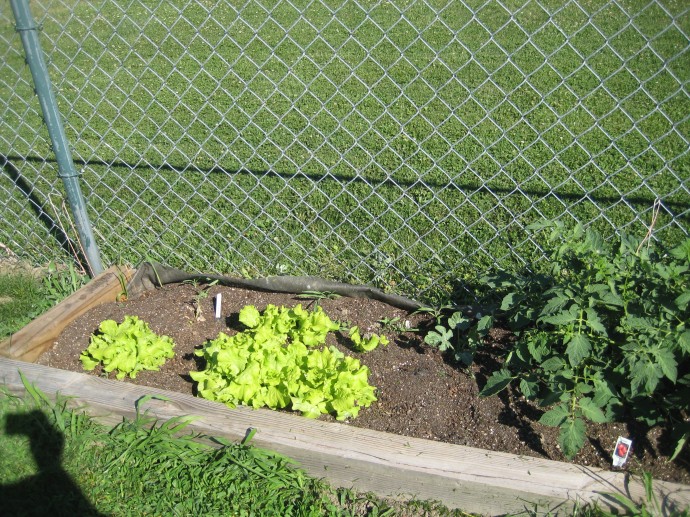
Some leaf lettuce on the end, and two tiny watermelon plants slowly coming up! Hopefully by next month the watermelon vines will be taking over the fence!

You can see the larger watermelon plant to the upper right of the leaf lettuce.  That one was started from seed and is looking really healthy, albeit small.  In the upper left corner next to that white stick is the second watermelon plant.  This one I purchased as a seedling from a local greenhouse, and handed it to my 4-year-old Big Helper to take over to the garden for me.  The next thing I heard was “Oops, Mommy, I think you should have taken this out.”  She had pulled the seedling straight out of the carton, completely exposing the roots!  All I could do was chuckle, and try to salvage the plant.  It’s not doing too great, needless to say.

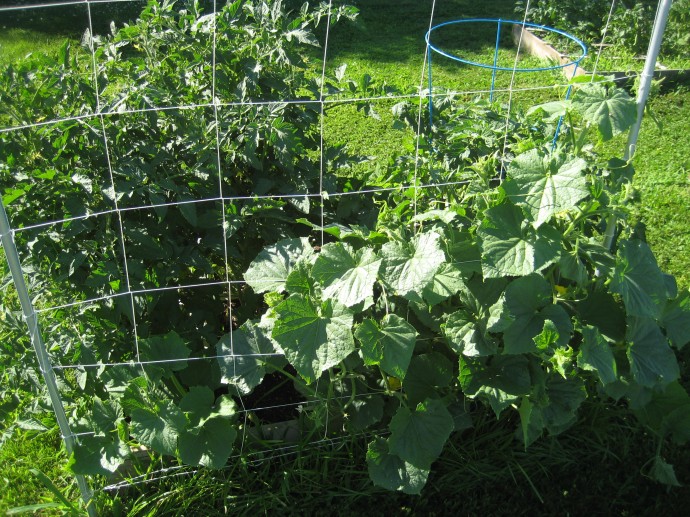
Cucumbers climbing the trellis

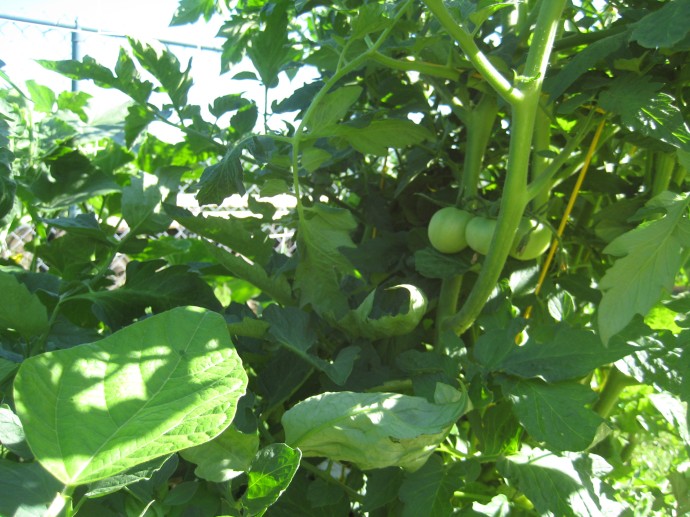
Tomatoes!

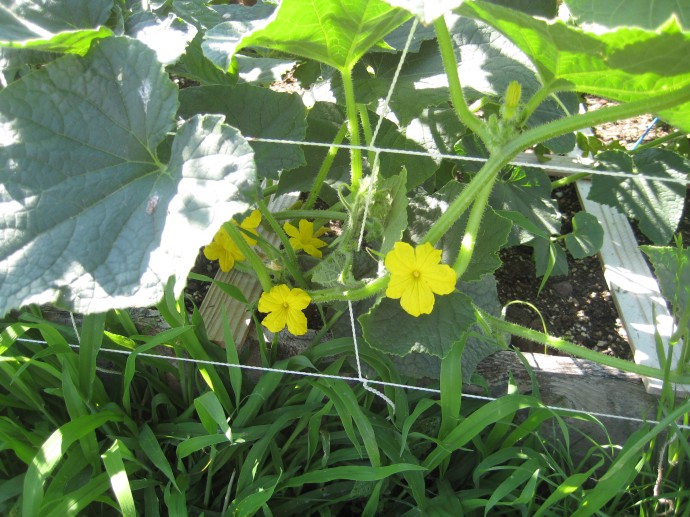
Pickle blossoms…Makes my mouth water just seeing these!

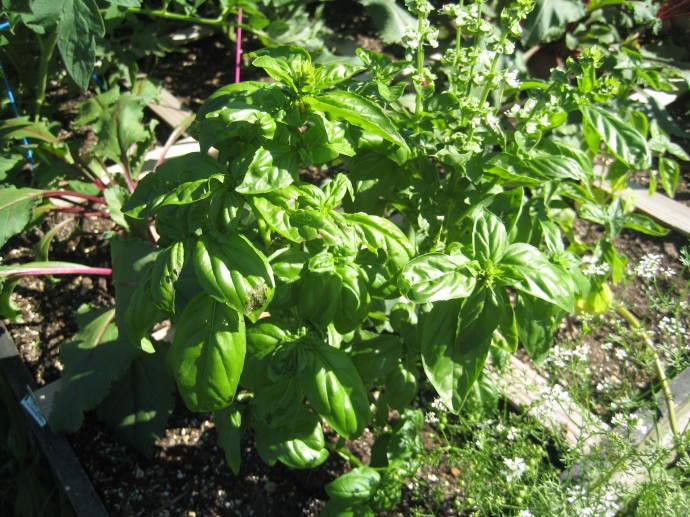
This is the 5th time I’ve tried to grow basil, and the FIRST time I’ve been successful! I have 4 healthy plants! Go, Mel’s Mix!

Only two beans plants came up, I think I will plant more though because green beans are my absolute favorite harvest, fresh out of the garden! I could eat these all day long!

I made a few mistakes planning my garden, but then I expected to make some mistakes my first time at SFG.  I spaced some of the plants a little unwisely, like putting the peppers next to the tomatoes and trying to grow snap peas in between two tomato plants.  Next year I think I will plant all my tomatoes along the fence, where they can grow as bushy as they want without stealing the sunlight from other plants.

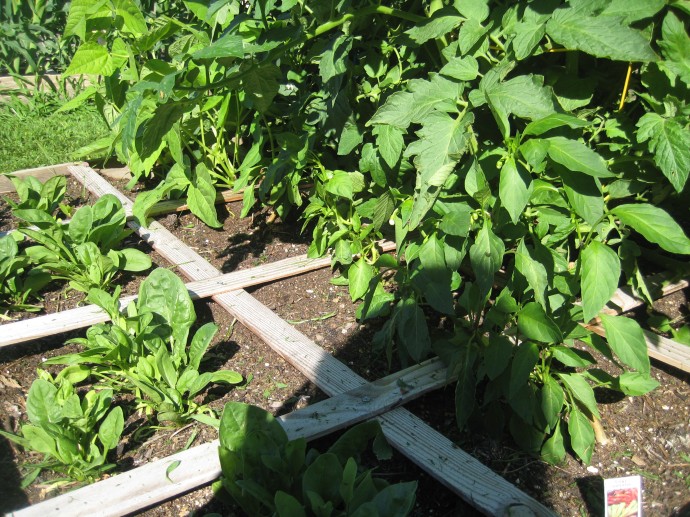
My poor banana pepper plants aren’t getting enough sun, although they are still producing some flowers. I’m going to try to stake them away from the tomatoes, towards the spinach.

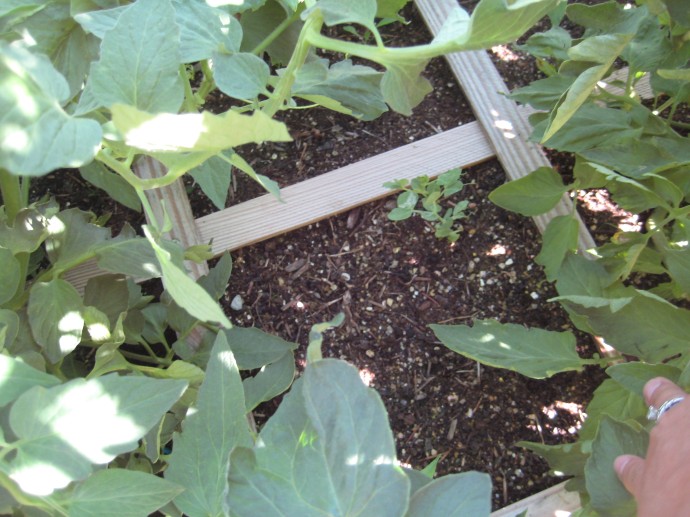
This sad little snap pea plant is completely overshadowed by two big bully tomato plants. I love snap peas passionately, but I’ve not had success with them yet. This is the third time I’ve tried to grow them…looks like I’ll have to try again next year!

Ok, enough about my garden!  Let’s get to the recipe!  Here’s the thing:  I’m not a huge fan of arugula raw.  Or at least I didn’t think I was, until I was faced with an overabundance of the stuff!  I happened to be surfing Pinterest for clever ways to serve pesto as an appetizer when I came across a recipe for arugula pesto.  So I whipped some up and it turns out that it is fantastic! I doubled this recipe mostly because I had so much arugula and also because I wanted to give some as gifts.  I also changed the recipe slightly.  The original recipe would call for a whole cup of oil to double the recipe, but as I was slowly adding the oil, it reached consistency at around 3/4 of a cup.

Arugula Pecan Pesto (This made enough for 2 half-pint jars)

What you will need:

  • 4 cups arugula, washed
  • 1 cup pecans
  • 2 garlic cloves
  • 1 cup fresh Parmesan cheese, grated
  • 3/4 cup extra-virgin olive oil, plus a little extra for toasting
  • salt and pepper if needed (I didn’t use any)
  • Food processor

Directions:

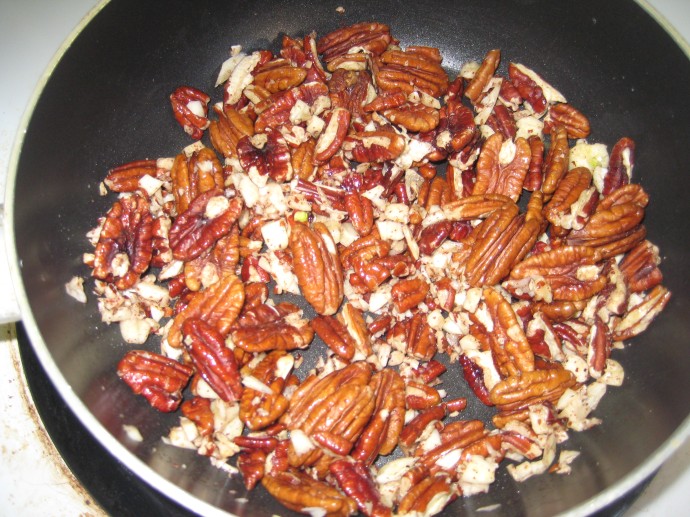
Warm a little oil in a saute pan on the stove and toast the garlic and pecans for about 2-3 minutes.

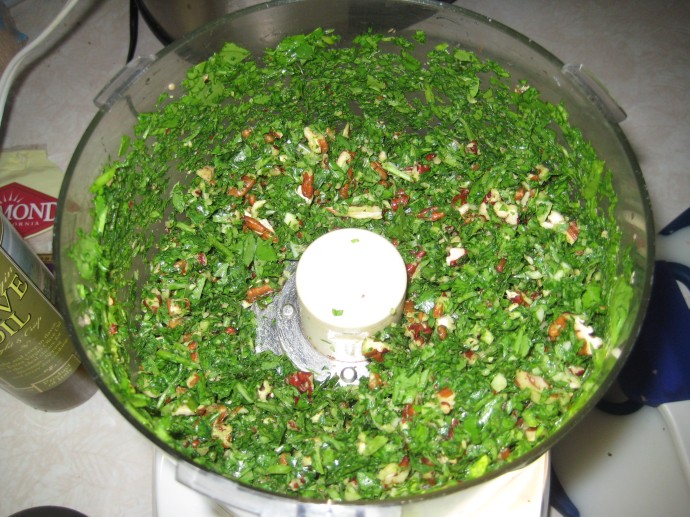
Add all ingredients, except salt and pepper, and half the oil to the food processor and pulse a few times.  Stop, scrape down the sides, then turn the food processor back on, adding the rest of the oil while the machine is running.

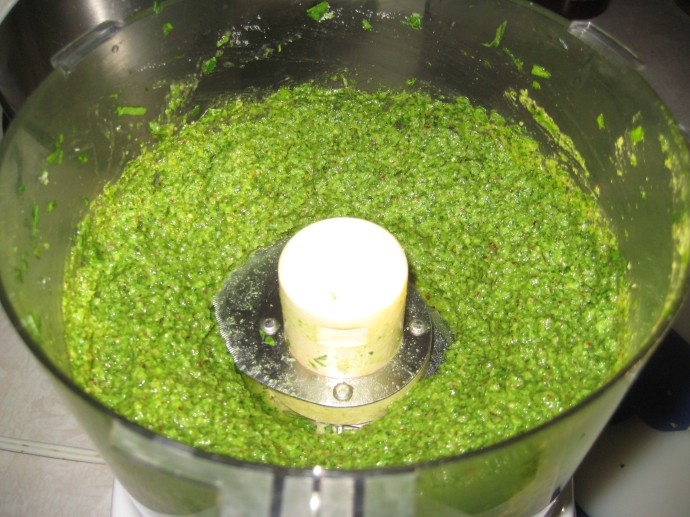
When the pesto has reached the consistency desired taste it and decide if it needs salt or pepper.  I think the arugula adds all the pepper it needs, and the cheese adds all the salt it needs, but you may decide it needs more.

After the pesto looks like this, it’s ready to be consumed!  You can mix it into pasta, spread it on toasted bread or pizza, or get creative!  I think it can be canned, but I haven’t tried that yet.  I’m going to whip up another batch soon though and try it, and then I’ll update this post.  I’m also pretty sure it will be fine frozen, I also haven’t tried that.

We’re having this on pizza for dinner tonight topped with fresh mozzarella and tomatoes!  Stay tuned for another arugula recipe coming soon!  (This post is already a wee bit long 😉 ) *Update* Here it is!  American Wedding Soup!

Does anyone have any other good uses for arugula for me?  I really do have a lot!  And if you live in the Toledo area, I’m happy to share!

Categories: Journal | Tags: , , , , , , , , , , ,

Wild Sockeye Salmon…For Breakfast!

Yesterday while grocery shopping I happened across a beautiful slab of wild-caught Sockeye salmon.  (Alaskan Red Sockeye) I practically stopped in my tracks because they are pretty hard to find around here except for commercially canned versions.  I’ve been on a salmon kick lately, due to this AMAZINGLY addicting recipe, and I’ve been hankering to try canning my own.  But I have looked high and low for fresh Sockeye salmon, and had not been able to find it anywhere!  oh, there’s plenty of farm-raised, color-added stuff out there, reasonably priced, even.  But I wanted the good stuff!  It was frozen, but in Ohio, that’s about as “fresh” as I’m gonna get!

You can understand my excitement at finding it!   It was $9.99/lb, which seemed a little steep to me, but never having had the privilege of buying it before, I didn’t have much of a frame of reference.  So I bought it on faith, and looked up prices online when I got home.  Fresh fish is always market price, so it’s hard to find local prices online.  I did find a few online stores that sold frozen Sockeye, and they were around $15.00 – $18.95/lb!  For commercially canned Sockeye, the best price I found online is around $0.72 per ounce, if bought in bulk.  (My Sockeye was $0.62 per ounce.)

So go me!  Turns out I found an incredible deal!  I’m going to tweak our budget a little and go back to Giant Eagle and get another slab!

I researched online and read a few forums on the best way to can salmon, and ultimately decided to just follow The Ball’s instructions.  I was a bit thrown when it said not to add any liquid, but Ol’ Ball hasn’t done me wrong yet!

So without further ado…ok, maybe just a little more ado…

Canned Salmon (or any fish, except tuna)

What you will need:

  • 2lbs Salmon, your choice.  I obviously prefer Sockeye
  • 1/2 Cup Canning Salt
  • 8 Cups of Water
  • 10 Half pint or 5 pint jars, no larger*
  • Pressure Canner and supplies

*Because seafood is very low in acidity, you must can them in half-pint or pint jars.  Heat penetration of larger jars may be inadequate to destroy bacterial spores.  (Source: Ball Complete Book of Home Preserving, page 394)

Directions:


1. In a large stainless steel bowl, create a brine by dissolving the salt in the water.    Slice the salmon into pieces that will fit into your jars.  (I did 10 pieces – 2 per pint) Soak salmon in the brine in the refrigerator for 1 hour.


2. Prepare pressure canner and lids 30 minutes before you are ready to pack the fish into the jars.  Wash jars, but do not heat them since you will be raw-packing the fish.  (Putting chilled fish into hot jars could cause breakage.)

3. When the fish is done soaking, drain and rinse for 10 minutes.  I don’t have a picture for this step because I forgot it.  The step.  Not the picture.  If you skip this step accidentally too, don’t worry.  I don’t think it affected the salmon much, if at all!

(Mmmm…suddenly I have a strange craving for sushi…)

4. Pack salmon into jars, with the skin side out.   Leave at least a 1″ headspace.  DO NOT ADD LIQUID.  (I know it’s weird, but trust me!  The oils pulled from the fish during processing will fill the jar about halfway with liquid.)  Here the Ball Book says “Remove any visible air bubbles.”  That part made me laugh a little…isn’t the whole jar a giant air bubble if there’s no liquid in it?  But just for good measure I swished the plastic tool around a little bit, releasing imaginary air bubbles.


5. Put a little vinegar on a paper towel and clean the rims of the jars.


6. Remove the lids from the simmering water and seal the jars.  Tighten rings.

7. Place jars in canner, adjust water depth if needed (As long as you had at least 3″ in there to begin with, you’ll be fine).  Lock lid, allow pressure to build and vent for 10 minutes then close vent.  Set gauge at 10lbs, and once pressure is achieved cook for 100 minutes for both half pints and pints.


8. Turn off heat and allow pressure to return to zero naturally.  Wait 2 more minutes, then open vent.  Remove lid, wait 10 minutes, then remove jars to a towel and let cool.  When they are completely cool, check lids for resistance and store for up to 1 year.  Although if you’ve tried this recipe from Keeper of The Home, they won’t last 1 month!

That’s it!  I think so far this was the easiest canning adventure I’ve ever had.  In fact, it was so easy that I kept thinking “What did I forget?  What did I miss?”.  Turns out I did miss step 3, and I fretted for awhile that the salmon would turn out too salty as a result of that, but it is great!  I also think next time I’ll either pack more into the pint jars or use half-pint jars for the same amount (around 5-7 oz in each pint).  I think it’s fine how I did it, but it seems like a waste of space to me.  (And admittedly, aesthetically it’s kinda bugging me…)

So I wanted to be able to tell you how it tasted and show you pictures of the finished product, so I went ahead and opened one this morning.


It looks a little unappetizing with the skin on, but  I scraped the skin off easily and flaked it up.  It flaked the same way commercially canned salmon does.  The salmon aroma was very pleasant, not as fishy as I’ve smelled before.  (Although if you’re not a salmon-lover, it will probably smell pretty fishy to you.)

Nice color, eh?  It definitely is a few hues lighter than it’s original beautiful red, but I was impressed at how pink it still was after canning it.  Now it’s time to taste it!  I don’t know about you, but I don’t usually wake up thinking, “Mmm, how about some salmon for breakfast?”  Nah, I’m more of an eggs and toast or yogurt kinda girl.  However, I already had plans for lunch and dinner, and really wanted to get this post on here today.  Plus I really was curious about how it would taste!  A quick Internet search for salmon suggested omelets or quiches, which sounded pretty good to me.  But Ty wasn’t interested in broadening his breakfast taste buds past cereal and I didn’t really want to go all gourmet just for little old me.  So I chopped up a potato and fried that up with oil, butter and rosemary, then scrambled an egg with about 3 teaspoons of salmon and 1/4 tsp of dried dill.  I topped the scrambled egg with a slice of mozzarella/provolone blend, added a little drizzle of hot sauce on the potatoes and YUM!  That was a delicious breakfast!  (Ha, ha, Ty!  Sucker!  Hope that cereal was everything you thought it’d be!)  

The Verdict:

I am THRILLED to report that the salmon turned out excellent!  I will absolutely be canning my own salmon whenever possible!

Categories: Canning, Low-Acid, Seafood | Tags: , , , , , , , , ,

Freedom Frappe

Move over, McDonalds.  You have lost your diabolical hold on me!  Free!  Free!  Thank God Almighty I’m free at last!

And thank you, Pinterest, for turning me on to this idea, although I’m adding something crucial to the original recipe…chocolate!  There might be other chocolate recipes out there, but the one I saw awhile ago just used regular white almond milk and isn’t nearly as palatable as with chocolate milk.

You’ve all had one of McDonald’s Frappes, right?  If not, do yourself a huge favor and NEVER EVER try one.  But since I already know you’ve had one and loved it, then I think I’ll be hearing songs sung in my honor and other praises of glory now that I’m about to help you free yourself from Mcd’s clutches.  Not only will this save some money, but it’s also a huge calorie-saver!  Dark Chocolate Almond Milk only has 120 calories and 3 grams of fat per cup.  For fellow Weight-Watcher dropouts, that’s only 2 points per 8 oz…as opposed to McDonald’s 8 points for a small (12 oz) plain Frappe!  Yowsa!  Not to mention all the questionable ingredients in their frappes, which the above link will take you to the list of.

Freedom Frappe (prepare ice cubes in advance!)

What you will need:

  • Coffee Ice Cubes (see below)
  • Dark Chocolate Almond Milk or regular chocolate milk
  • A blender

Directions:

First things first, you need to make the coffee ice cubes!  It’s taken me awhile to actually procure leftover coffee for this project, because such a thing rarely exists in our house.  In fact, I actually brewed an entire pot of coffee AFTER we already drank our customary morning pot just so I could let it cool and freeze it.

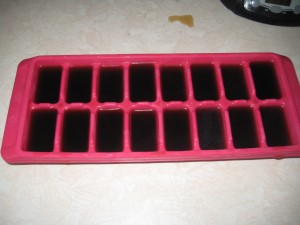
The pictures are pretty self-explanatory, but just in case you’re still confused, pour your lukewarm or cold coffee into an empty ice cube tray and freeze.

If you don’t have an ice-maker and actually NEED all your ice cube trays, simply transfer the frozen cubes to a freezer baggie or container and reclaim your tray.

Now for the fun part!  Grab your coffee cubes and almond milk.

(I realize my coffee is unfrozen in this picture.  Sometimes my brain processes events out of order.)

I discovered almond milk after my second daughter was born.  Both my girls were sensitive to dairy as newborns, and as a breastfeeding mama that meant I had to eliminate all the dairy from my diet.  I won’t go into the trials and tribulations regarding eliminating my favorite food group, but instead mention that I was very happy to find that the dark chocolate almond milk is almost as delicious as real chocolate milk.  You could also use real chocolate milk in this recipe if the thought of almond milk is too hippy for you, but I like the flavor variants the almond milk provides.

Add 8 ounces (1 cup) of milk to the blender.

Add some coffee cubes.  I think 5 is a good amount, it keeps it very chocolatey but doesn’t mask any of the coffee flavor.  You might like more or less than that.

Blend.

Serve, drink, and think of me fondly.


Categories: Leftovers

Tomato Basil Soup from Actual Tomatoes

I’ve never made my own tomato soup before.  I have, however, consumed approximately 8,000,000 cans of tomato soup over the last 2, almost 3 decades.  I’m sure that’s not much of an exaggeration, either.  It’s kind of ironic how much I love tomato soup and all tomato products because until recently, I wouldn’t touch a raw tomato with a 10-foot pole.  I’ve since matured drastically in a culinary sense (I’ve even started eating mushrooms!  Gasp!) and no longer sneer at tomatoes, even gone as far as ceasing to pick them off of menu items.  So lately it’s occurred to me that it’s high time to finally make my own tomato soup, for once and for all.

Are you starting to worry that this is becoming more of a blog on soup than it is on preserving?  Me too.  I have an addiction!

But in my defense, it was a pretty crappy day.

No sun in sight.  Rain, dreariness, inside activities.  All signs that point toward soup.

Okay, here’s the scoop:  Everyone has a thing, right?  Well, I go in phases.  I guess you could even say phases are my thing.  The phase I’m going through right now is that commercially canned foods are from the devil because of BPA, even though I’m not even entirely sure what BPA is or why it’s from the devil.  (You can read the link, but if you’re like me all you’ll get from that is “don’t eat it, it’s from the devil”) But whatever, that’s my thing.  So anyway, the point of telling you that is because I had a really hard time finding tomato soup recipes that were truly from scratch.  They all used canned tomatoes, which are apparently some of the worst offenders for the whole BPA thing, so obviously I don’t want to use them.

So here’s a quick tutorial on making tomato sauce.  We’ll revisit this in about a month when the tomatoes are in season, but they’re pretty cheap in the stores right now anyway, so maybe this is useful information now!

Tomato Sauce (makes about 1 quart)

What you will need:

  • 8 big juicy tomatoes, like beefsteak or big boys
  • 8 Roma tomatoes
  • a strainer
  • a food processor
  • a pot
  • a plethora of paper towels or a heavy duty sponge

Directions:

The first step is to wash the tomatoes.  Next, we’re going to blanch them to remove the peels easier.  You do this by bringing a pot of water to a boil.  For the larger tomatoes, you might want to cut them in half, but it’s not necessary.  Just a little easier.  Once the water is boiling, you carefully place the tomatoes in the water for about 30 seconds to 1 minute.

Then remove them, and with a tongs or a fork, peel the skin away.  It should peel away without much effort.  If it’s still sticking, return the tomato to the boiling water for another 30 seconds. You can technically skip this step since we’re going to strain the tomatoes anyway, but I think it makes straining so much easier to get rid of the peels first.

Next, empty the water from the pan, cut up the tomatoes into halves or quarters and return them to the empty pan.

Heat, stirring often, over medium-high heat for 10 minutes, or until they look like this:

This is when I start salivating, and my husband – who worked in a tomato factory as a teen – leaves the house.  Once the tomatoes have boiled down to a chunky sauce, turn the heat off and bring out the food processor.  Load up the food processor and puree the tomatoes. Depending on the size of your processor, you may need empty and re-load to process all the tomatoes.

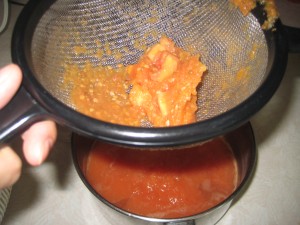
Now it’s time to strain out the seeds!  The best way I’ve found to do this is by using a strainer.  (Go figure) Ladle one or two scoops of puree at a time into the strainer, and hold over an empty bowl or pan.  BANG the strainer on the bowl to get all the “meat” through.  This is much faster and more effective than pressing the puree with a spoon.  It does make a little bit of a mess, but that’s what the sponge is for!

This is what the strainer should look like after you’ve smacked all the meat out of it:

Just the seeds and whatever didn’t boil down is left!  All the good saucy meat made it through!  Once you’ve done this to all of the puree, return the sauce to the stove and bring to a boil.

Now, from this point, if you just want sauce, you’ll bring to a boil, reduce to a simmer for about an hour until the sauce is the consistency you prefer.  From here you could can the sauce or freeze if you aren’t going to immediately use it.

But since we are going to immediately use it, go ahead and let it simmer down for 30 minutes or so, or until it’s thicker than a soup consistency.  Now we make soup!  I used this recipe for the base of my soup.

Tomato Basil Soup 

What you will need:

Directions:

Follow the directions from the above link, substituting the tomato sauce for the cans of tomatoes.  Add the cheese to the soup at the very end while the soup is simmering hot and allow it to completely melt and become one with the soup.  It really adds a heartiness and amps up the “comfort” level (aka, calories…) of the soup!


The Verdict

It turned out really good, although in typical Chelsea fashion it was a little trial by error.  I started with only about a pint of sauce so it wasn’t a rich enough “tomato” flavor for me, but once I added more sauce I liked it.  You can skip my sauce and just make it with cans of devil tomatoes like the recipe calls for, which is probably more accurate than my rendition.  We got several meals out of this!  The first meal was served with a hunk of homemade bread (which I almost burned, but still turned out pretty good), another meal was served with lemon cream pasta (which I added sauteed garlic too…a must!), and the last meal was served on this rainy June day with…duh…grilled cheese!  As I was making grilled cheese I got feisty and threw some cheddar into the soup as it was heating up (Ok, I’m lying.  It wasn’t cheddar.  It was fake plastic American cheese.  Also from the devil, but somehow not a part of my current thing.) and that made all the difference in the world!  Now imagine if I had used real cheddar!  That didn’t surprise my husband at all when I did that because I’m well known for adding half a block of shredded cheese to my tomato soup. So rather than make you discover this happy pairing by perchance, I figured I’d just add it to the recipe.

An Important Afterthought

Oh yeah!  This is a food preservation blog… I keep getting distracted by recipes and the actual consuming of the food!  If you want to make up a bunch and pressure-can it, do not add the cream.  That has to be added as you heat it because it’s not recommended to can dairy.  If you choose to can this soup, process quarts at 10 lbs pressure for 30 minutes and pints for 25 minutes.  You could also eliminate the carrots and chicken broth and can it in a water-boiling canner, processing quarts for 40 minutes and pints for 35.  Either way, pressure-canned or water-boiled, you do need to add 2 Tbsp to quarts and 1 Tbsp to pints of bottled lemon juice (fresh squeezed lemon juice doesn’t contain the appropriate amount of acidity). If canning is not for you, you can always freeze it!  I ended up adding the cream to mine and freezing it, because as a life-long yo-yo dieter I just don’t make a habit of keeping cream in the house, so I wanted to use it all before it a) went bad or b) tempted me to dip chocolate chip cookies in it.

Cheers!

Categories: Canning, Freezing, High-Acid, Soup

Blog at WordPress.com.