Canning

Dilly Beans and Drying Dill

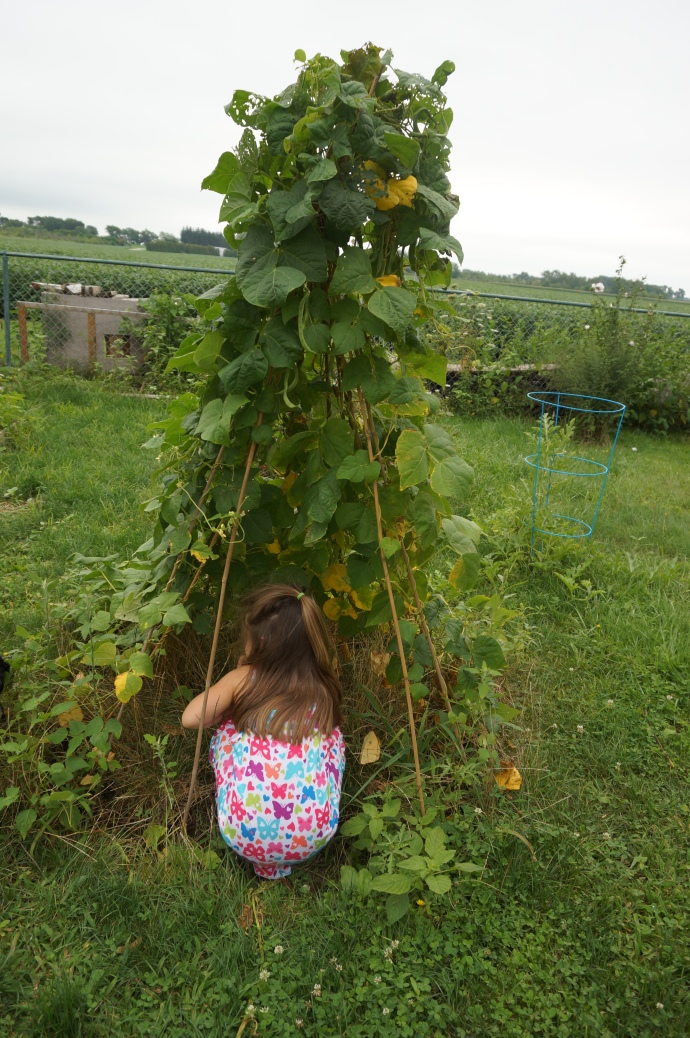
DSC02203Depending on the maturity of your green beans right now, this recipe could be exactly the diversity you’re looking for with a surplus of beans… or it could be a few weeks late, as is the case with MY green beans.  Doh!

DSC02188

Actually, as cute as this teepee turned out, I’ve discovered that I don’t love pole beans.  They seem a little stringier and tough than bush beans…anyone else feel that way too?  I will use the teepee next year for a different climber or perhaps even flowers, and plant bush beans.

DSC02184

Anyone know the correct spelling of “teepee”?  According to Wikipedia, it can be spelled “tipi”, “tepee”, or “teepee”.  Spellchecker likes “tepee”, but I always thought it was “teepee”.

You know, once I spelled it out so many times, I don’t think any of them look right…

Anyway, fortunately for me, my in-laws planted more bush beans than the two of them could consume, and gladly handed me a large shopping back of green and wax beans!  (And I didn’t even have to pick them!!  Bonus!)  They also passed on a recipe I’ve been salivating over for a year now.  I’d never heard of “dilly beans” before I was given a taste last year, and WOW!  Mind. Blown.  They are like combining my favorite flavor – dill pickles – with my favorite vegetable – green beans.  What’s not to love?

DSC02205

Nothing.  That’s what.  There’s actually a recipe for Dilled Beans (what a boring name!  Not nearly as country and cute as “dilly”!) in the Ball Book of Home Preserving.  I kind of combined Ball’s recipe with my in-law’s recipe, because Ball calls for red bell peppers, which I NEVER have at home, but also called for peppercorns, which I thought sounded like a nice addition.  I’m going to give you my combined recipe, and I’ll mention substitutions as we go along.

DSC01933

Dilly Beans Makes 4 pint jars

What you will need: 

  • 2lbs green and/or wax beans, washed and trimmed
  • 1/4 cup canning salt
  • 2 1/2 cups vinegar
  • 2 1/2 cups water
  • 1 tsp cayenne pepper (Here Ball calls for 2 small red bell peppers, seeded and sliced into thin strips)
  • 4 cloves of garlic, divided
  • 4-8 sprigs of fresh dill* (see notes below)
  • 12 whole peppercorns, optional

Directions:

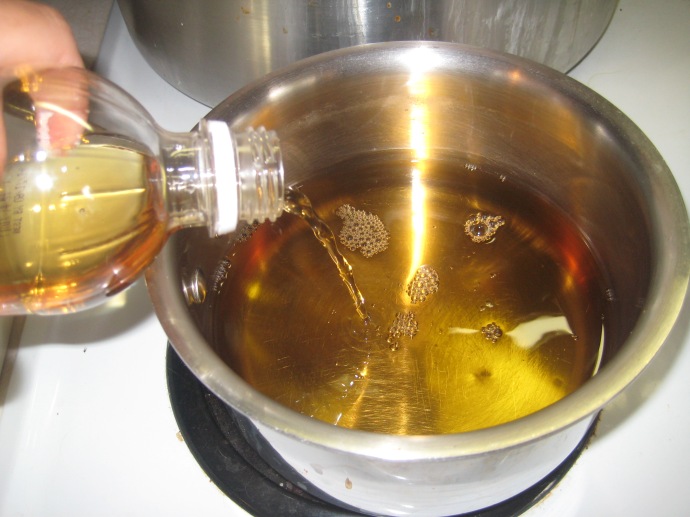
Prepare canner, jars, and lids.  Combine salt, vinegar, and water in stainless steel saucepan over medium-high heat.  Bring to a boil, stirring to dissolve salt.  You can trim the beans to “jar-length” or into “grocery store style frozen cut green beans-length” like I did.  Personal preference trumps aesthetics!

DSC01914

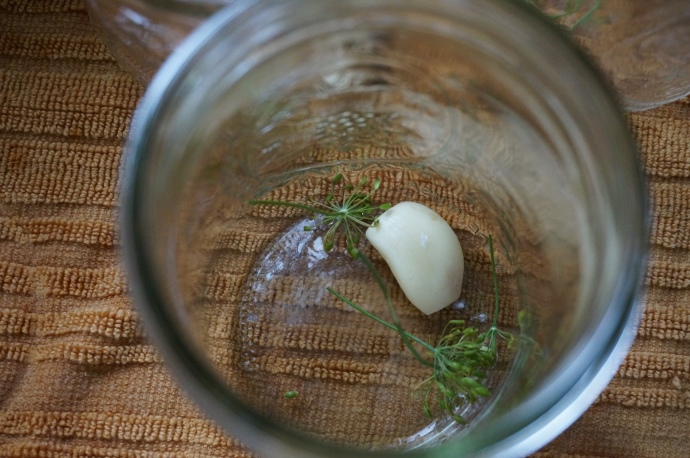
Place 3 peppercorns, 1 or 2 sprigs of dill (or 3…), cayenne (or one strip of red pepper), and one clove of garlic in each hot jar.  I wussed out on the cayenne here and only used a “smidgen”.  Seriously.  My measuring spoon says “smidgen”.  Isn’t it cute?

DSC01916

Pack beans into jars to within a 1/2 inch headspace.

DSC01913

Ladle hot brine into jars to cover beans, leaving 1/2 inch headspace.  Remove air bubbles, adjust headspace if necessary.  Wipe rim.  Center lid on jar, tighten ring with normal pressure.  Do not over-tighten.  Place jars in canner, ensuring they are completely covered with water.   Bring to a boil and process for 10 minutes.  Remove canner lid.  Wait 5 minutes, then remove jars, cool and store.

A few notes:

DSC02100

*Dill sprigs are the smaller “flower” of the entire dill head.  You can use scissors to cut the sprigs from the head.

I never seem to have enough brine, no matter how much the recipe calls for.  I went ahead and tripled this recipe because I had more like 5lbs of beans, but couldn’t fit all the pints into my canner.  So I simply refrigerated the last jar of dilly beans.  This worked, but give them a week to really pickle correctly!  I kept trying them every day, and by about 7 days the two remaining beans were nice and pickly flavored!  Ha!  I do think the flavor is best canned, though.

Drying Dill:

DSC02101

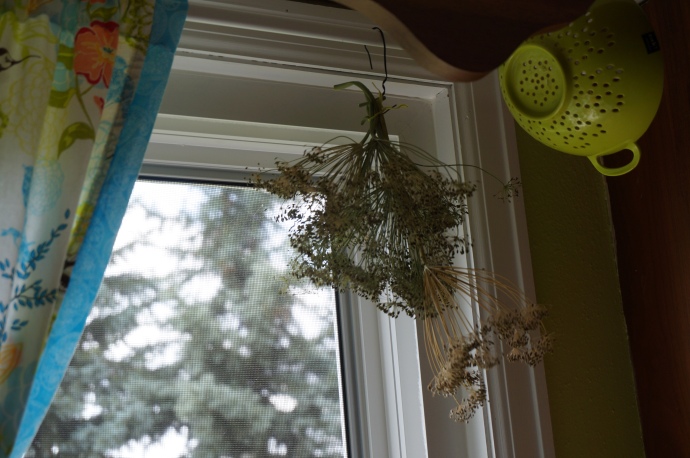
If you were lucky to be given several giant heads of dill from your parent’s garden like I was, hang them up to dry!  Once the seeds are dry, you can harvest them and store them in a jar for future recipes!  I just store mine in an old “dill seed” spice jar because it’s already labeled, and it fits on my lazy susan.  So far I haven’t had an issues with molding, although if you store them before they are completely dried, that may happen.  In the above picture you can see the difference between a head of “completely dried” dill, and one that still needs a week or so.  In the meantime, it makes me look all productive and stuff with the dill hanging there, doesn’t it?  Ha ha!

For easier printing:

  • 2lbs green and/or wax beans, washed and trimmed
  • 1/4 cup canning salt
  • 2 1/2 cups vinegar
  • 2 1/2 cups water
  • 1 tsp cayenne pepper (Or 2 small red bell peppers, seeded and sliced into thin strips)
  • 4 cloves of garlic, divided
  • 4-8 sprigs of fresh dill*
  • 12 whole peppercorns, optional

Directions:

  1. Prepare canner, jars, and lids
  2. Combine salt, vinegar, and water in stainless steel saucepan over medium-high heat.  Bring to a boil, stirring to dissolve salt.
  3. Place 3 peppercorns, 1 or 2 sprigs of dill, cayenne (or one strip of red pepper), and one clove of garlic in each hot jar.  Pack beans into jars to within a 1/2 inch headspace.  Ladle hot brine into jars to cover beans, leaving 1/2 inch headspace.  Remove air bubbles, adjust headspace if necessary.  Wipe rim.  Center lid on jar, tighten ring with normal pressure.  Do not over-tighten.
  4. Place jars in canner, ensuring they are completely covered with water.   Bring to a boil and process for 10 minutes.  Remove canner lid.  Wait 5 minutes, then remove jars, cool and store.

One more thing… great taste buds think alike, apparently!  Just yesterday, as I was working on this post, my favorite sister-in-law, Erin, posted this Japanese green bean stir fry recipe!  It looks DELICIOUS, and I think I’m going to go pick some beans this weekend at my mother-and-father-in-law’s garden just to try it!

Categories: Canning, Dehydrating, Pickles, Vegetables | Tags: , , , , , , , , , ,

Homemade Ketchup and an Update You Didn’t Ask For

Remember me?

It’s been awhile…  4 months, to be more specific.  I haven’t forgotten you!  Just got caught up in life!  I have a few new adventures – one being that my husband, after nearly 3 years of being unemployed, got a job!  He actually went into my family’s business and is LOVING it!  I’m so happy for him, because he’s spent most of his career being relatively unsatisfied.  Now he’s running a school catering business and putting his super annoy… incredible efficiency skills to good use!  Another bit of news is that I have a “job” too!  I started babysitting these two darling girls who are sisters, just 11 months and 20 months old.  (Crazy people!  My girls are three YEARS apart and I thought that was kinda fast!!)  It’s a really good fit, having four girls running around during the day, and it makes me chuckle a little to think that with cleaning my parent’s house every other week and babysitting full time during the week, I’m actually getting PAID to be a stay-at-home Mom!  Ha!
So, life is good!  I also invested in a new camera, and after my next two posts (which are already photographed by my old crappy camera)  you will start seeing some sharper pictures of the canning process.  I sure know how to keep you on pins and needles, eh Dear Reader?  🙂

A sneak peak of my new photographic capabilities!  This is my youngest daughter, Dagny.  Isn't she just the epitome of summer here?

A sneak peak of my new photographic capabilities! This is my youngest daughter, Dagny. Isn’t she just the epitome of summer memories here?

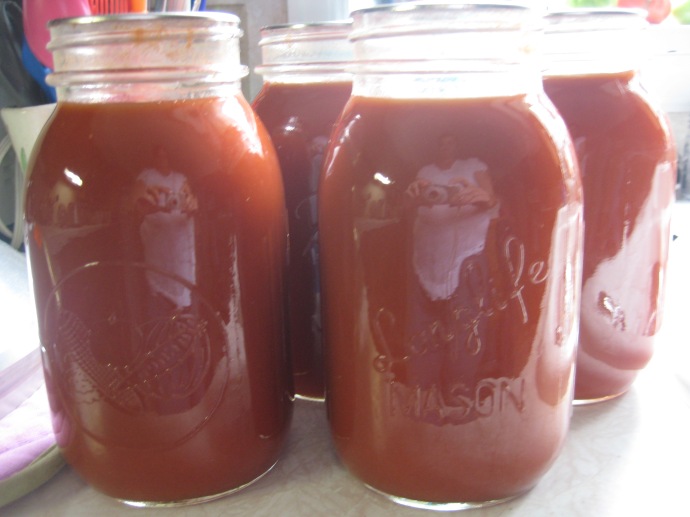
Anyway, I made some ketchup way back, even before Christmas.  I think I even alluded to it like a tease on my Facebook Page, but then never bothered to post it.  This ended up being a blessing in disguise though, because it gave my family time to actually consume the ketchup!  I still have a quart left, and I’ve learned a few valuable lessons:

1. Make this in small batches.  Unless you eat ketchup every single day with every single meal, you probably won’t consume an entire quart before it goes bad.

2. Do not store this in one of those cool retro red ketchup bottles or anything that doesn’t have a lid in the refrigerator, because if you do you will find yourself eating it and thinking it doesn’t taste quite right.  And then you will discover mold.  And then you will die of horror.

3. Do not put too much cayenne in the batch or your children will not eat it.  Wussies.

4. Whilst in the “reduction” phase of this recipe, a “low boil” is NOT the same as a “simmer”.  A low boil is more like reducing the heat from a high heat to a medium heat.  You want the sauce to boil down sometime while you’re still young, and if you turn the heat all the way down to simmer, you will die and be buried before it ever reaches the consistency you desire.  I’m actually writing from Heaven as we speak.  It’s amazing up here!  Say yes to Jesus!

5. Make this.  It’s really good and worth buying all the unfamiliar spices for!  The directions are all from The Ball Complete Book of Home Preservation, and they claim that the consistency will be thinner than commercial ketchup.  I think you can probably get pretty close to the right consistency depending on your patience in the reduction phase.  My batch turned out a little thinner than Heinz, but still held up nicely on a french fry.

Homemade Ketchup or Catsup for you weirdos out there 😉

Makes about 7 pint jars

What you will need:

  • 3 Tbsp celery seeds
  • 4 tsp whole cloves
  • 2 cinnamon sticks (4 inches each), broken into pieces
  • 1 1/2 tsp whole allspice
  • 3 cups cider vinegar
  • 24 lbs tomatoes, cored and quartered
  • 3 cups chopped onions
  • 1 tsp cayenne pepper
  • 1 1/2 cups granulated sugar
  • 1/4 cup pickling or canning salt

Directions:

1. Tie celery seeds, cloves, cinnamon sticks and allspice in a corner of cheesecloth, creating a spice bag.

1. Tie celery seeds, cloves, cinnamon sticks and allspice in a corner of cheesecloth, creating a spice bag.

2. In a stainless steel saucepan, add vinegar and spice bag.  Bring to a boil over high heat.  Remove from heat and let stand for 25 minutes.  Discard spice bag.

2. In a stainless steel saucepan, add vinegar and spice bag. Bring to a boil over high heat. Remove from heat and let stand for 25 minutes. Discard spice bag.

3. In a large stainless steel saucepan, combine tomatoes, onions and cayenne.  Bring to a boil over high heat, stirring frequently.  Reduce heat and boil gently for 20 minutes.  Add infused vinegar and boil gently until vegetables are soft and mixture begins to thicken, about 30 minutes.  (I actually pureed and strained my tomatoes before adding the vinegar.  You can do it either way.)

3. In a large stainless steel saucepan, combine tomatoes, onions and cayenne. Bring to a boil over high heat, stirring frequently. Reduce heat and boil gently for 20 minutes. Add infused vinegar and boil gently until vegetables are soft and mixture begins to thicken, about 30 minutes. (I actually pureed and strained my tomatoes before adding the vinegar. You can do it either way.)

Using a food mill or a food processor and working in batches, puree mixture.  Transfer mixture to a mesh colander placed over a glass or stainless steel bowl, shaking and  banging the colander on the side of the bowl to force the liquids through.  Discard solids.

4. Using a food mill or a food processor and working in batches, puree mixture. Transfer mixture to a mesh colander placed over a glass or stainless steel bowl, shaking and banging the colander on the side of the bowl to force the liquids through. Discard solids.


5. Return liquid to saucepan.  Add sugar and salt.  Bring to a boil over medium heat, stirring occasionally.  Reduce heat and boil gently, stirring frequently, until volume is reduced by half and mixture is almost the consistency of commercial ketchup, about 45 minutes

6. Meanwhile, prepare jars and lids.  See Instructions for Boiling-Water Canning.

7. Ladle hot ketchup into hot jars, leaving 1/2 inch headspace.  Remove air bubbles and adjust headspace if necessary, by adding hot ketchup.  Wipe rim.  Center lid on jar.  Screw band down until resistence is met, then increase to fingertip-tight.

8. Place jars in canner, ensuring they are completely covered with water.  Bring to a boil and process for 15 minutes. Remove canner lid.  Wait 5 minutes, then remove jars, cool and store.

I chose to can this into quarts, which I would not recommend.  Pints or half-pints make much more sense since there are no preservatives!  (Am I wearing a muumuu in the reflection?  That was SO 4 months ago! Tsk!)

I chose to can this into quarts, which I would not recommend. Pints or half-pints make much more sense since there are no preservatives! (Am I wearing a muumuu in the reflection? That was SO 4 months ago! Tsk!)

Categories: Canning, High-Acid, Journal, Tomatoes | Tags: , , , , , ,

Apple Pie Filling in a Jar

Apple season is pretty much over, and applesauce is usually the most popular canning choice when faced with a case of apples, but I decided to switch it up this year.  Well, that and I still have a jar of applesauce left from last year.  My kids go through phases, and they are NOT in an applesauce phase right now.  So anyway, I thought this looked pretty fun!  It took me awhile to find the ClearJel, so I’m going to save you the trouble and tell you right now that you will probably have a hard time finding it in store, too.  Here’s a link to a good price on ClearJel on Amazon.  (Plus if you go through this link I get a small percentage of the sale at no additional cost to you!  Thanks!)

Why use ClearJel instead of cornstarch?  “ClearJel is a cooking starch that is acceptable for use in home canning.  Not all cooking starches are suitable for home canning, as reheating causes some to lose viscosity.  Making mixtures too thick can interfere with required heat penetration during heat processing.”  (Ball Complete Book of Home Preservation, p. 170)

Apple Pie Filling  Makes about 7 pint jars (or 3 quart jars, if you weren’t paying attention and accidentally filled quart jars instead of pint jars.)

What you will need:

  • 12 cups sliced peeled cored apples, treated to prevent browning (directions below!)
  • 2 3/4 cups granulated sugar
  • 3/4 cup ClearJel
  • 1 1/2 tsp ground cinnamon
  • 1/2 tsp nutmeg
  • 1 1/4 cups cold water
  • 2 1/2 cups unsweetened apple juice
  • 1/2 bottled lemon juice

Directions:

1. Prepare canner, jars and lids.  For more information, click here

2. In a large pot of boiling water, working with 6 cups at a time, blanch apple slices for 1 minute.  Remove with a slotted spoon and keep warm in a covered bowl.

I actually poured a teapot of hot water over the apples instead

(I actually just heated a teapot and poured the water into a large bowl holding all the apple slices.  That seemed easier.)

3. In a large stainless steel saucepan, combine sugar, ClearJel, cinnamon, nutmeg, water and apple juice.

IMG_2189

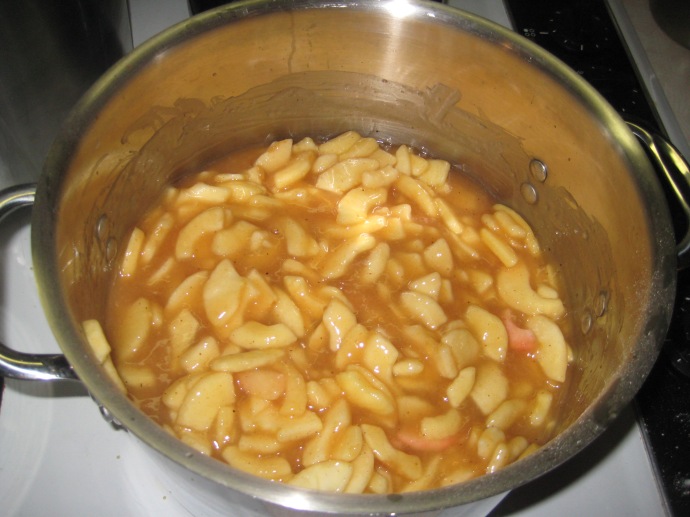
Bring to a boil over medium-high heat, stirring constantly, and cook until mixture thickens and begins to bubble.  Add lemon juice, return to a boil for 1 minute, stirring constantly.  Remove from heat.

IMG_2192

Drain apple slices and immediately fold into hot mixture.

IMG_2193

Before processing, heat, stirring, until apples are heated through.

IMG_2195

4. Ladle hot pie filling into hot jars, leaving 1 inch headspace.  Remove air bubbles and adjust headspace, if necessary, by adding hot filling.  Wipe rim.  Center lid on jar.  Screw band down until resistance is met, then increase to fingertip-tight.

5. Place jars in canner, ensuring they are completely covered with water.  Bring to a boil and process for 25 minutes for pint jars and 35 for quarts.  Remove canner lid.  Wait 5 minutes, then remove jars, cool and store.

There you have it!  Not too hard, eh?  Now any time of the year you have a yen for apple pie or apple turnovers, all you have to do is buy make pie crusts and open your jar! 😉
PS.  Did you notice my new ladle??  It is so awesome; I am smitten!  It gets into every nook and cranny of the jar and has made my life just that much easier!  I got mine at Meijer, but here’s a link at Amazon if you want to check it out!
Categories: Canning, Fruit, High-Acid | Tags: , , , , , , , , ,

Orange You Glad I Didn’t Say “Banana”?

Knock knock…  Who’s there?

Banana.  Banana Who?

Knock knock…  Who’s there?

Banana.  BANANA WHO?

Knock knock…  WHO’S THERE?

Orange.  Orange who?

Orange you glad I didn’t say “banana”?

I’m sorry.  I have a 4-year-old and a 1-year-old.  This is my life, people.  And for two days, so was bananas.  My Dad dropped off an entire case of bananas the other day, and they were so ripe that I had to immediately address them, otherwise I was going to be reduced to making 10,000 loaves of banana bread.  Not that I don’t love banana bread as much as the next housewife…  I just don’t need a year’s supply of it.  After all, zucchini bread wants some attention too.

Anyway, I had a lot of bananas, so I got online and looked up as many recipes for bananas that intrigued me as I could.  I’m going to share just the recipes and pictures of the finished products because both you and me have lives outside of bananas, regardless of what the bananas want you to think.

Let’s begin:

Canning

Banana Butter 

This is really delicious and I plan on giving these as Christmas gifts!  I thought it was tasty on toast, and I think it would also be delicious in a peanut butter sandwich!  Here’s a link to the recipe and canning instructions:  Banana Butter Recipe
Dehydrating

Honey-glazed Banana Chips

These were really good!  And very easy to make.  Simply whisk up a glaze with 1/4 cup of honey and 1/4 cup of water.  Slice the bananas 1/4″ thick into the glaze, stir them around a bit and lift them out with a slotted spoon.  Place on trays and dry for 6-10 hours.  You could also sprinkle a little cinnamon into that glaze!

Banana Leather

Here’s the key ingredient to making fruit leather:  GREASE THE SHEET!  Sheesh.  That little tidbit was kind of hidden in my book of dehydrating recipes, and that kind of knowledge doesn’t come naturally to me, so this is what I got the FIRST time I made this:

Uh, yeah.  My fingernails hurt so bad by the time I finished peeling this off!  The SECOND time I made this, I used a dab of coconut oil and spread it around the Fruit Roll Sheet with a paper towel.  Then I pureed the bananas in a food processor until they were liquified, then spread it over the Fruit Roll Sheet.  It took about 8 hours to dry (until there are no longer any sticky parts).  Then it peeled right off!  I forgot to take a picture of that, but you can see it all rolled up and wrapped in plastic in the top picture.  (For the record, no one in my house was that excited about “banana leather”.  If I ever make it again, I think I’ll add a few other fruits to it.)


Freezing

Banana Smoothie Cubes

These are super easy to make.  Just slice bananas into about 1″ chunks, lay flat on a baking sheet, and pop the sheet into the freezer until the bananas are completely frozen.  Then transfer them to a freezer-safe bag or container and label them!


What to do with these?  Add them to any smoothie!  Start with frozen banana chunks in the blender with a little milk.  Add other fruits for a fruity smoothie, or some peanut butter for a good workout recovery smoothie, or some chocolate syrup, whipped cream and a cherry for a dessert!  Thanks to my sister-in-law, Erin, for that last one!  Yum!

Baking

Peanut Butter Banana Bread with Chocolate Chips

As it turns out, I made this last and then found myself wishing I’d made 10,000 loaves of it and that lifetime supply!  *Ding ding diiiiing!*  We have a winner, folks!  This was, hands down, the BEST banana bread…wait…the best BREAD I’ve ever eaten (or made) in my life.  I took it to a family get-together this week and it received rave reviews from everyone!  (Click on the link above for the recipe!)   I can’t believe I forgot to take a picture of this, but Linda’s pictures are better than mine could ever be anyway.


Well, there we have it.  Enough uses for a banana to fill your week!  (How many times did I write the word “banana”?  I’m tired of that word!)

Categories: Canning, Dehydrating, Freezing, Fruit, Leftovers | Tags: , , , , , ,

The Last of the Garden: Potatoes!

I was a little late in harvesting my potatoes this year… I got busy trying to get into a new routine that included beginning homeschool for my preschooler!  I didn’t make it out to the garden for over a week, and in that time the potato vines went from “dying” to “dead”.  It wasn’t a big deal, the potatoes were fine for the most part, although they were beginning to get molested by some sort of bug or fungus.

Potatoes are fun to grow.  Have you ever tried growing them?  I didn’t grow nearly as many as I intended to this year.  I completely forgot to even plant sweet potatoes, and I wish I would have at least doubled the white and red potatoes that I planted.   They are so easy to grow, and require absolutely no attention while they grow besides weeding.  As an added bonus, come harvest, you get to dig in the dirt and search for them!  It’s fun for all ages!

This is the first time I’ve ever “preserved” potatoes.  I know I could have stored them in the basement long term just in a brown paper bag, but for one, I didn’t have that many, and secondly I was a little concerned about some of the potatoes that looked like a bug got to them.  I wasn’t sure if they would store well or rot quickly.  Lastly, I actually purchase sliced canned potatoes (*gasp!*) because my husband makes the most delicious fried potatoes with them.  The canned kind cook up so much tastier than a fresh potato sliced does, too.  So anyway, it made sense to me to slice and can my potatoes instead of storing them in the basement and hoping they last, while still purchasing canned potatoes.  Right?  🙂
This was pretty easy to do…once you get all the potatoes peeled, that is.  But after you get through that, the rest is simple!

Sliced Canned Potatoes

What you will need:

  • Food Processor
  • Colander
  • Stainless Steel Stock Pot
  • Peeled white potatoes (I forgot to weigh mine!  The Ball Book says you’ll need 2-3 lbs per pint if CUBING them.  Eyeballing my pile, it looks like around 6-7lbs, and I got 3 quarts of slices out of that.  Don’t quote me on it though.)
  • Boiling Water

Directions:

  1. After you peel each potato, put it into a stainless steel pot filled with cold water to prevent browning.  Once all the potatoes are peeled, drain them into a colander, rinse them, and fill the pot back up with fresh cold water and put the potatoes back in the water.
  2. Using your food processor with the slicing attachment (or a sharp chef knife and careful fingers!), slice each of the potatoes, putting the slices immediately back into the water to keep them from browning.  Once you have sliced all the potatoes, put the full pot on the stove and begin to heat the water.
  3. Begin heating clean jars in your pressure canner on the stove, and lids in a separate pan.  Fill another pot with water and bring to a boil.  (I actually just used my teapot for easier pouring!)
  4. Heat the sliced potatoes until they are hot through.  You don’t need to boil them.  Just pull one slice out with a tongs and check if it’s hot.  Once they are hot, you are ready to fill the jars.  Drain the potatoes back into a colander, then fill the hot jars.
  5. Fill jars with boiling water to a 1-inch headspace.  Using a plastic tool, slide it between the potato slices and the jar, releasing air bubbles.  Adjust headspace if needed.
  6. Wipe rims and place lids on jars.  Tighten rings, and place back in the canner.
  7. Vent 10 minutes, set gauge to 10lbs psi, and let pressure build.  Once 10 or 11 lbs psi is achieved, process pints for 35 minutes and quarts for 40 minutes.
  8. Turn off heat and allow pressure to return to zero naturally.  Once it reaches zero, wait 2 more minutes, then remove gauge and canner lid.  Wait 10 minutes for jars to acclimate to your kitchen temperature, then remove jars to a towel on the counter.
  9. Let jars cool completely, clean lids, label and store up to 1 year!

    Don’t they look kind of neat stacked up in there?

Ty’s Delicious Fried Sliced Potatoes

There’s no specific recipe for these.  You basically just heat some oil and butter in a fry pan, add the potatoes, a little  red wine vinegar, lots of salt and pepper, and some more butter.  Fry them, stirring minimally, until they are brown and the outsides are crispy.  Serve them with a perfectly grilled medium-rare steak.  That is an order!  (I had a picture of these, but for some reason I can’t get it to upload.  Computers are weird when they’re selective.)

Categories: Canning, Low-Acid, Potatoes | Tags: , , , , , , , ,

Pickles: My First Love

Mrs. Wages dill pickles

I think in the future, looking back on this summer, I can probably call this “The Summer of Pickles”.  I’ve made three different kinds of pickles this summer, mostly out of experimentation, and with the ultimate goal of achieving my heart’s desire:  Vlasic, without the food coloring and preservatives.  I’ve always been a Vlasic girl, and unfortunately, it looks like I’m going to continue to be one.  I just cannot seem to nail down the right recipe!  I tried Mrs. Wages dill mix, and the flavor is great, but the crunch is non-existent.  I tried fermentation, and the crunch is decent and the flavor is unique and delicious, but it just isn’t Vlasic.  The best pickle I’ve made so far, in fact, is the recipe for “Old South” pickles on the back of Mrs. Wages pickling lime mix.  It’s basically a bread-and-butter pickle, but better.  I love them, but I can’t promise my heart to them exclusively.

I’m not going to give up.  I shall pursue my quest for a Vlasic copycat.  And when I master it, you will be the first to know!

In the meantime, here are some tips for pickling cucumbers.  I actually have not followed ALL these tips yet, which hopefully is why my pickles haven’t been super crunchy.  The problem is that I’m growing my own pickling cucumbers, and I only get 2-3 ready at the same time, and I don’t really feel like putting all that effort into 2-3 pickles!  I’ve decided NOT to grow my own pickling cucumbers next year, and instead order them in bulk from my local produce market owner.  He told me that I can order them by size, which will be nice because then they will all be around the same size and ready for pickling at the same time!

Cucumber Tips:

  • Use the cucumbers the day of or up to 24 hours of picking them (for the best crunch.  You can certainly use them after that, but they won’t be as crunchy.)
  • Do not wash the cucumbers until you are ready to use them!  They start to deteriorate much quicker once washed.
  • When making dill pickles, select pickles that are no longer than 6 inches.
  • Cut 1/16 inch off each end of the cucumber.  The blossom end contain enzymes that can cause soft pickles.
  • Use only pickling cucumbers, the pickling brine will not be able to penetrate the wax coating on other cucumbers.

Brine Tips:

  • Use only stainless steel or glass equipment.  Other materials can react with the acid and alter the taste and color of the pickles.  Especially do not use wooden spoons, they will absorb the flavor!  (And, as a former Cutco salesgirl, I feel inclined to urge you to pitch all your wooden spoons and cutting boards.  They are nasty and unsanitary!  That is all.)
  • Always use high-quality commercial white distilled or cider vinegar with 5% acidity unless other types are specified in the recipe.
  • Use Pickling Salt instead of table or iodized salt, and use the correct amount called for in the recipe.
  • Use only new dried spices, if using.  Spices that have been on the shelf for over a year will not produce the best result.
  • You need soft water to make pickles.  If you only have hard water, you can soften your water by doing this: Bring hard water to a boil in a large stainless steel saucepan and boil for 15 minutes.  Remove from heat, cover and let stand for 24 hours.  Skim off any scum that has formed on the surface and carefully decant or ladle into another container, without disturbing the sediment that collects at the bottom.

(All tips were taken from the Ball Complete Book of Home Preserving)

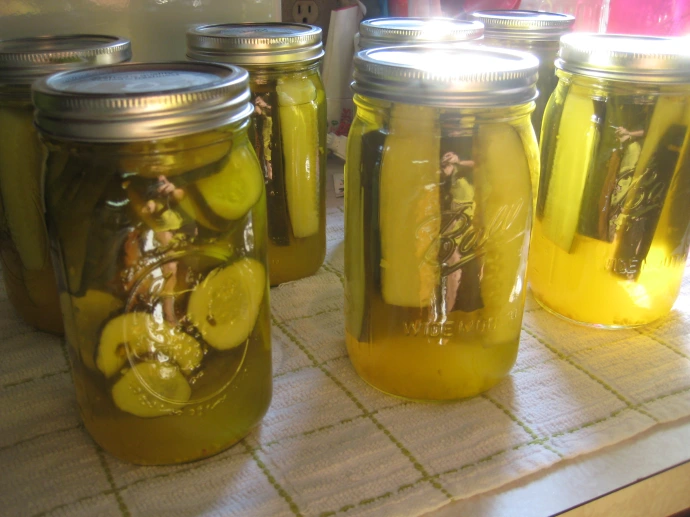
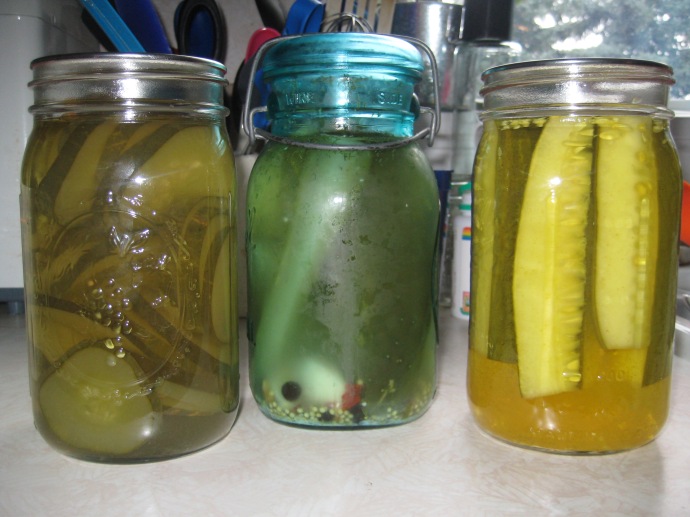
Old South on the Left, Refrigerator Pickles in the middle (How cool is that jar? I found 3 of those at a garage sale this summer!), and Mrs. Wages Dill mix on the right.

Here are a few recipes for you to experiment with:

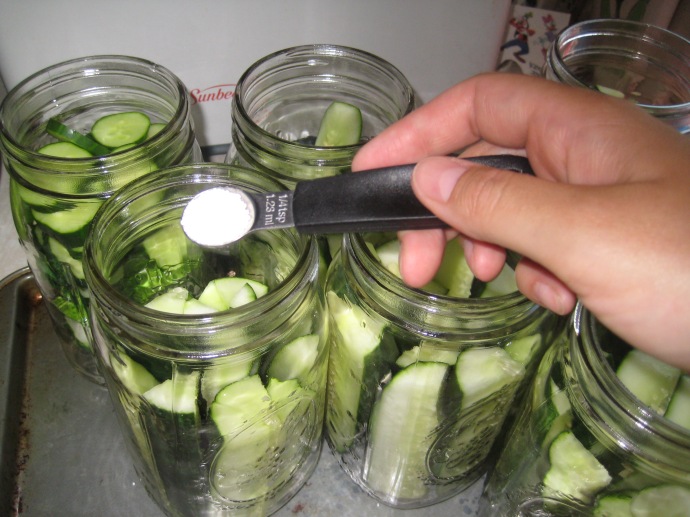
I made the dill pickles with Mrs. Wages dill mix, which is pretty simple to do.  I added Pickle Crisp, and can tell you that if you are a) not using pickling cucumbers, or b) not using freshly picked cucumbers, that even with the Pickle Crisp, you will NOT get crisp pickles.

Adding Pickle Crisp to my dills

Rather than write out a whole post on it, I will just direct you to the wonderful blog post I found for the refrigerator pickles.  Recipe for fermentation-style refrigerator pickles

Doesn’t this jar look like something from the ’70s? I’m slightly concerned it actually might be, since I purchased it from a teeny tiny grocery store in a teeny tiny town. The mix YOU will be buying comes in 2012 packing;)

Old South Cucumber Lime Pickles

What you will need:

7 lbs cucumbers (sliced crosswise)

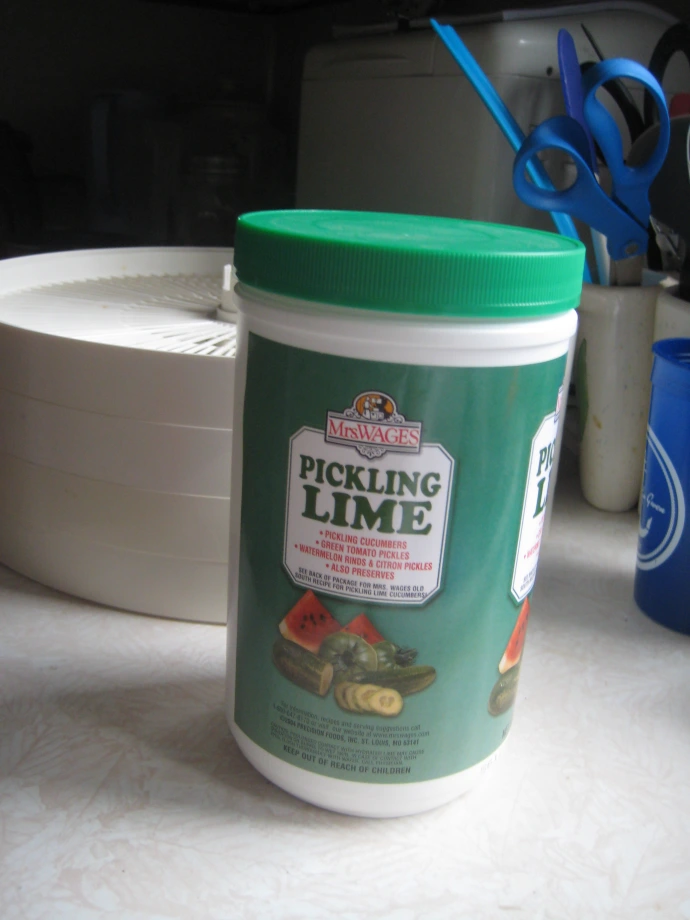
1 cup Mrs. Wages Pickling Lime

2 gallons water

8 cups white distilled vinegar, 5% acidity

8 cups sugar

1 Tbsp pickling salt

2 tsp mixed pickling spices

Directions:

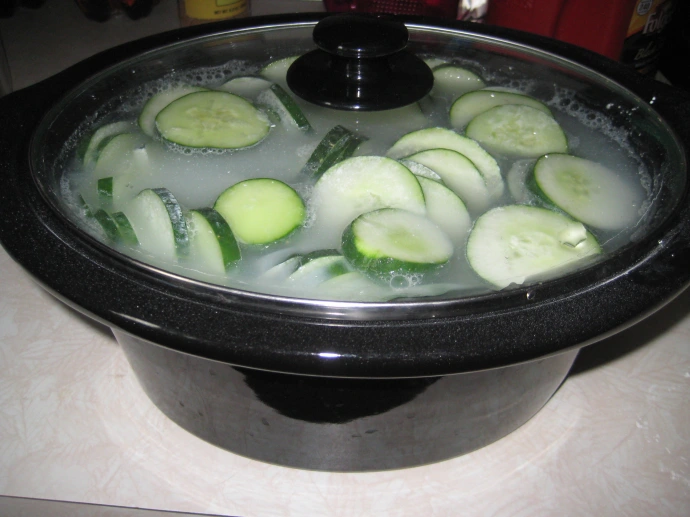
  1. Soak clean cucumbers in water and lime mixture in crockery or enamel ware for 2 hours or overnight.  Do not use aluminum ware.  (I used my two biggest crockpots)
  2. Remove sliced cucumbers from lime water.  Discard lime water. Rinse 3 times in fresh cold water. Soak 3 hours in fresh ice water.
  3. Combine vinegar, sugar, salt and mixed pickling spices in a large pot. Bring to a low boil, stirring until sugar dissolves.  Remove syrup from heat and add sliced cucumbers.  Soak 5-6 hours or overnight.
  4. Boil the slices in the syrup 35 minutes.  Fill sterilized jars with hot slices.  Pour hot syrup over the slices, leaving 1/2 inch headspace.  Cap each jar when filled.
  5. Process pints 10 minutes, quarts 15 minutes in a boiling water bath canner.
  6. Test jars for airtight seals according to manufacturer’s instructions.

(Recipe taken directly off the jar of Mrs. Wages Pickling Lime!)

The Old South pickles are pretty good!   It is a labor-intensive recipe, but I really like them and think it is worth the effort.  I will be making them again next year.

I’m still getting cucumbers out in my garden, so when I get around to it, here is  The next pickle recipe I’m going to try!

Wish me luck!  And good luck with your own!

Categories: Canning, Fermentation, High-Acid, Pickles | Tags: , , , , , , , , , , , ,

Basic Tomato Sauce and Condensed Tomato Soup

I’ve been making my own tomato sauce for several years now and have gotten into a certain…rhythm.  It’s not a difficult process, per se, but it is time consuming and extremely messy.  So messy, in fact, that the first time I made tomato sauce as an adult (without the tutelage of my wise mother) I swore I would never put myself through such an ordeal again.   My kitchen was a disaster and my sauce turned out thin and uninspiring.  In fact, I didn’t even use some of the quarts I had canned because looking at them brought back such unpleasant memories!   (Who says cooking isn’t an emotional experience?)

Those days are gone.  I’ve trial-and-error’d tomato sauce to a Chelsea Perfection: a rhythm I am pleased with, and a product I am thrilled with.  There is no need to blanch and peel the tomatoes, and all you need is a food processor and a strainer!

Step 1 – Choosing Tomatoes:  Choose the right kind of tomatoes!  If you can, use at least 50% of your batch with Romas.  They are small but meaty, and will give you the consistency of sauce you desire.  I like to blend 3-4 kinds of tomatoes to get the best flavors.  This year I planted and harvested Romas, 2 kinds of Heirlooms, and Better Boys.  Or Big Boys.  Or Early Girls.  I can’t remember.  I’m not sure it matters.  They’re red and if you let them get very ripe on the vine they have an amazing flavor…or so claims my husband.  I hate raw tomatoes, but adore all tomato products.  I know, I’m weird.

Step 2  – Preparing Tomatoes: Wash the tomatoes, slice in half, and cut out any blemishes, spots, cracks and the cores.  I then quarter them, and throw them all into a stainless steel pot.  According to the Ball Book of Home Preserving, “the acid in tomatoes can react with aluminum, copper, brass, galvanized or iron equipment, creating bitter flavors and undesirable colors”.  Turn the heat on medium, and cook them down into a mush.  Sometimes I even take a potato masher and make sure the chunks are practically liquified.  This isn’t totally necessary, but it does help to speed the process up a little.

Step 3 – Process and Strain: Here comes the messy parts!  I set up a work station like this:

Tomatoes in pot on stove (yes, I realize this is not a stainless steel pot. I’m a rebel.), next is food processor, next is the pot sauce will get strained into, then a waste bowl for the seeds and skins.

Once the tomatoes are completely cooked down, and resemble sauce more than whole tomatoes, break out your food processor.  Ladle a few cups of mush into the food processor and blend for several seconds.  Then transfer the liquid to your strainer.  Jiggle the strainer a bit to get all the juice through, then – with moderate force – bang the strainer down on the edge of the bowl to encourage the sauce through.  This doesn’t take very long, less than a minute.  There is no need to use a spoon to force it through, just do a variety of bang-bang-jiggle-jiggle’s on the side of the bowl.

Bang-Bang-Jiggle-Jiggle!

Once all the sauce is forced through the strainer, all that is left is the skins and seeds!

Step 4 Reduce Sauce:  Once all the mush has been processed and strained, return the pure sauce to the pan.  I usually rinse or wash the pan first, to make sure there aren’t any rogue seeds left in there.  Now assess your sauce.  Is it already the consistency you desire?  If so, you are ready to can, freeze or use it.  If it’s still a little thin then you want to reduce it.  Reduce is a word that the meaning of which eluded me the first time I made sauce.  What reduce means, in the cooking world, is to bring your sauce to a boil, then turn the heat down to a simmer, and let the sauce simmer for some time until the amount of sauce has decreased.  What happens during this time is that the juice evaporates, and the overall quality of the sauce thickens.  Depending on the type of tomatoes you use, sometimes you need to reduce your sauce by half!  (Meaning, you will get 2 quarts instead of 4!)  Try not to let this discourage you, as it did me at first.  You will be much happier with a thicker sauce when the time comes to use it, and even though it seems frustrating to “lose” half your sauce, you really want a nice, thick sauce in the end.

So anyway, if you need to reduce your sauce, do it now.  This might take an hour, so be patient.  Keep the heat on simmer and stir occasionally.  I usually need to reduce my sauce by a third, using the 3-4 kinds of tomatoes that I use, and it takes about 45 minutes to an hour.

Your finished product is a pure, no-additives, nice, thick tomato sauce from scratch!  At this point, you can use it, transfer it to freezer-safe jars or bags (you should let it cool first!), or you can can it.

Step 5 – Clean your kitchen!  Messy stuff, eh?

Canning Tomato Sauce

How much sauce you will yield will depend on how many pounds of tomatoes you started with, and how much you needed to reduce your sauce.  It’s highly variable.  I usually get about 3 quarts out of a full large stockpot of quartered tomatoes.  You will really have to play it by ear and hold off on preparing your jars and lids until your sauce is done so you can eyeball it and see how many jars you will need.

See the canning process for a boiling-water canner here, (you can also pressure can tomato sauce…more on that at a later date!) adding these steps:

  • Tomato products need bottled lemon juice added.  Add 1 tablespoon to pints and 2 tablespoons to quarts.
  • Process pints for 35 minutes and quarts for 40 minutes.

Jars acclimating to room temperature

Condensed Tomato Soup

Makes 4 pints.

In my quest to rid my cupboards of Campbell’s (*sniff* I love Campbell’s!), I needed to come up with a condensed tomato soup version.  I could just make a delicious tomato soup and freeze it like a normal person, but normal people think ahead and pull stuff out of the freezer the day before they want it.  I never know I want tomato soup until about 10 minutes before I HAVE to have it, so freezer soup isn’t gonna cut it!  There’s also that tricky problem that you’re not really supposed to can anything with thickeners or dairy due to heat’s inability to penetrate those types of fat for safe consumption.  SO, I’m shooting for a product very similar to Campbell’s Condensed Tomato Soup.  Open jar, add milk, microwave.  Yum.  Here’s what I came up with, and it’s shockingly easy.

What you need:

  • 8 cups tomato sauce
  • 2 tablespoons sugar (more or less to taste)
  • 1/2 teaspoon garlic salt
  • 1 teaspoon salt
  • bottled lemon juice

Directions:

1. Bring sauce to a boil, add sugar.  Add 1 tablespoon of lemon juice to each pint.  Follow these basic steps for canning with a boiling-water canner, and process pints for 35 minutes.

2. When ready to use, open jar and dump into bowl.  Add half a pint (1 cup) of milk, and warm on stove or in microwave.  I usually add shredded cheese to my soup (I like a lot of cheese.  Like, a ridiculous handful.  And I wonder why I’m chubby.)  Serve alone or with grilled cheese sandwiches!  (No, the grilled cheese sandwiches do not always replace the insane amount of cheese I put in my soup.  I have problems.)

The Verdict:

It tastes very similar to Campbell’s!  It’s a little more tangy, which I like.  I am absolutely thrilled to be able to have the convenience of canned soup that tastes almost exactly like the real thing without all the cons – BPA, high fructose corn syrup, etc.  It’s a keeper!

Categories: Canning, Freezing, High-Acid, Soup, Tomatoes | Tags: , , , , , , , , , ,

Canning Classes and HOT Pickled Peppers!

That’s me in the salmon shirt at the stove. Isn’t my friend Sarah’s kitchen amazing? It really was the perfect gathering place for 20+ women.

Monday night I was honored to be asked to teach a canning class for my church’s Mom’s Group, MOMentum, at the home of a new friend.  I knew about this class several months ago, a fact that did not discourage me from my typical procrastinating style.  I started thinking about the class a week in advance, but it wasn’t until about a day before the actual class that I finally decided on WHAT to can!  I had to keep it simple since it was an introductory class, I also needed to keep it short since it was an evening class and well, everyone has lives outside of food preservation.

Some of the lovely ladies at the class


Also, my fabulous in-laws gifted me with an entire bowl of what we all thought were banana peppers.  I discovered this honest mistake at the expense of my poor one-year-old’s reaction to chomping down on a pepper ring.  I quickly tasted the offending ring and realized that this was no innocent banana pepper!  This baby was HOT!  And my baby was MAD!  I’m pretty sure she’s scarred for life over peppers, and there’s a good chance she’ll never trust me again.  Mama duped her, ain’t no two ways about it!

Another shot of this gorgeous stove, and me trying to look nonchalant. I really don’t think “nonchalant” is a word anyone would use to describe me, no matter how hard I try to achieve the appearance of such. (Yes, I’m aware of the oxymoron there)


Anyway, I digress.  So I settled on pickling these spicy peppers since I had them, and also because the recipe is simple, and they only needed to process for 10 minutes.  Perfect!  I washed and cut them all into rings before the class.  I brought samples of everything I have canned this year, which looked kinda cool on my friend’s counter, I have to admit.  I brought my pressure canner, mostly because I wanted to show it off, but also because I really have no desire to use my “borrowed” boiling-water canner anymore.  The pressure canner is taller, and I never have the concern that it will boil over like I did with the boiling-water canner.  Since I can use my pressure canner AS a boiling-water canner, why not?

Sarah, our host, teaching us about how to make delicious, healthy smoothies!


The class went well!  I’m not a natural teacher, despite the fact that I used to be a musical theater actress in high school and college.  I get wildly nervous standing on the same floor as my peers, trying to get information from my brain out of my mouth in a coherent manner.  Being up on a stage with rehearsed lines… way different.  At any rate, we all had a lot of fun, and I think I was able to sputter out the basic steps of canning.

It did occur to me, however, that although the steps are usually included with my recipes in my posts, I really should have a specific page dedicated to them.

More harvest posts are coming as well, I have been canning nearly every day for about two weeks and have lots to share with you!  For now, here is the recipe for Hot Pickled Peppers!

Hot Pickled Peppers (Recipe adapted from the Ball Complete Book of Home Preserving)

What you will need:

  • 2 lbs hot yellow peppers
  • 6 cups white vinegar
  • 2 cups water
  • 3 cloves of garlic, crushed

Directions:

  1. Heat jars in boiling-water canner
  2. Place lids in small saucepan, simmer (not boil) until ready to use
  3. Wash peppers and slice into rings.  Consider wearing gloves while doing this step, otherwise avoid touching anything on your face for the rest of the day!
  4. In a large stainless steel saucepan, combine vinegar, water and garlic.  Bring to a boil over medium-high heat.  Reduce heat and boil gently for 5 minutes, until garlic flavor has infused the liquid.  Discard garlic.
  5. Pack peppers into hot jars to within a generous 1/2 inch (1 cm) headspace.  Remove air bubbles and adjust headspace if necessary.  Wipe rim, center lid on jar.  Fingertip-tighten rings.
  6. Place jars in canner, ensuring they are covered by water by at least 1 inch.  Bring to a boil and process for 10 minutes.  Turn off heat, remove canner lid.  Wait 5 minutes, then remove jars to a towel on the counter, cool, label and store.

Categories: Canning, High-Acid | Tags: , , , , , ,

Preserved Garlic: Delicious Meets Healthy…Maybe

Why preserve garlic? 

Garlic is one of Nature’s most helpful foods.  Besides warding off pesky vampires, it’s also renowned for preventing and treating colds, the flu, and cold sores.  I found this quote very interesting, although I admit I did not follow up on the source to see if it’s true or not.  This source seems to back that up, though.

“Modern science has shown that garlic is a powerful natural antibiotic, albeit broad-spectrum rather than targeted. The bacteria in the body do not appear to evolve resistance to the garlic as they do to many modern pharmaceutical antibiotics. This means that its positive health benefits can continue over time rather than helping to breed antibiotic resistant ‘superbugs’.” (Source)

At any rate, there is some speculation that garlic loses some of it’s antibiotic qualities once cooked.  It does not, however, lose any of it’s delicious, delicious flavor.

And isn’t that what eating should be about?  Flavor?  Enjoyment?  What a treat it is to find a food that is all a food should be.  Flavor.  Enjoyment.  Nutritious.  Guilt-free.

Well you aren’t gonna find the latter here, because we are about to smother the former three adjectives in sugar, oil and alcohol.  Guilt, you can come pop a squat right next to this cellulite!

Preserved Garlic (Because it might be good for you…  )

What you will need: (Makes 4 half-pints)

  • 2lbs whole garlic, about 5 cups
  • 1/2 cup extra-virgin olive oil
  • 1 Tbsp kosher salt
  • 1/2 cups sugar
  • 1/3 cup sherry vinegar or champagne vinegar
  • pressure canner

Directions:

The first thing you need to do is peel the garlic, if you were a big enough sucker to buy whole garlic instead a jar of pre-peeled cloves.  *Ahem*  Let me just tell you that if you have never peeled 2 lbs of garlic by hand on a sweaty afternoon with two small children begging for attention, you just haven’t lived.  I can however, offer some tips on how to “quickly” peel garlic.  There’s three ways:

  1. Watch this video.  It’s some kind of magic trick.  I couldn’t get it to work, but I think it’s because I’m not a 250-lb super strong man.  I also don’t have two large bowls the same size.
  2. Cut off the large end of each clove, then rock the flat edge of a chef knife over the clove and the skin should fall off fairly easily.  Be careful with your pressure though.  It’s okay if the clove gets a little smashed, but you want the clove to remain as intact as possible.
  3. Soak the cloves in water for at least 1 minute, then peel.  This is the method I used, and it took me about 2 hrs to peel 2lbs.  (Now you know why I put quotes around the “quickly” up there.) I did take several breaks though to address my children.

I eventually got an assembly line of sorts going on: Separate the cloves, Soak the cloves, Cut off the ends, Peel, Admire.

I got this recipe from this blog, and while most people would be grateful enough just for the amazing recipe, I am also eternally grateful for this different, much easier way to sterilize/keep the jars hot.  I struggled to sterilize them on the stove because my back large burner doesn’t work, and the pot is too large to place over a small burner.

Anyway, here’s how you do it:  Turn your oven to 220 degrees.  Place 5 half-pint jars (it’s always good to prepare an extra jar just in case) in a pan or on a baking sheet and place in oven until ready to use.  (He also said you can sterilize the lids in the oven, but I chose to heat them in simmering water on the stove.)

*****UPDATED****** I don’t do this anymore.  I got a new large burner for my stove, and now I just heat the jars in the canner while I’m preparing recipes.  You can use the stove method, but it’s not recommended in the Ball Book of Home Preserving because ovens have inconsistent temperatures and there is a chance that the varying temperatures can cause breakage when you go from the oven to the hot water.  (I never lost a jar doing that, though.  So whatever.)

Meanwhile, prepare pressure canner with 3 inches of water.  Heat over medium heat.

Now for the garlic:  In a large saute pan, heat the oil then cook the peeled cloves over medium heat.  Add the salt.

Beginning to brown…

Once the cloves begin to brown, after about 10 minutes, add the sugar and cook 3-5 more minutes or until they begin to caramelize.

Sugar added, caramelizing…

Add the sherry vinegar and turn the heat up to medium-high.  Cook for about 2 minutes.

Adding the sherry vinegar…

Remove jars from oven and fill with cloves and sauce, leaving a 1- inch headspace.

I used 2 half-pints, and 3 jelly jars (process all for 10 minutes)

I added a little extra oil and sherry vinegar (a few drops of each) to each jar so that the garlic was almost covered.  Wipe rims with a vinegar-soaked paper towel, add lids and rims, tighten, and place jars in canner.

Allow canner to vent 10 minutes, then set to 10lbs pressure.  Once pressure is achieved, cook 10 minutes for half-pints, 20 minutes for pints.  Allow canner to return pressure to 0lbs, then remove vent and lid.  Wait 10 minutes, then remove jars to a towel on the counter and let cool completely.

Okay, I confess:  I didn’t wait for them to cool completely.  We had company over for dinner that night and I was in the mood for some serious compliments.  I served these over perfectly grilled steaks (grilled by my grill-master hubby) with a glass of full-bodied red wine and smiled nonchalantly at each exclamation of delight.

This is why you preserve garlic.  Because they so good that when you are sneaking downstairs in the middle of the night for a snack, you eyeball the jar of them and seriously consider choosing preserved garlic over M&M’s.

And because they might be good for you 😉

Categories: Canning, Low-Acid, Vegetables | Tags: , , , ,

Wild Sockeye Salmon…For Breakfast!

Yesterday while grocery shopping I happened across a beautiful slab of wild-caught Sockeye salmon.  (Alaskan Red Sockeye) I practically stopped in my tracks because they are pretty hard to find around here except for commercially canned versions.  I’ve been on a salmon kick lately, due to this AMAZINGLY addicting recipe, and I’ve been hankering to try canning my own.  But I have looked high and low for fresh Sockeye salmon, and had not been able to find it anywhere!  oh, there’s plenty of farm-raised, color-added stuff out there, reasonably priced, even.  But I wanted the good stuff!  It was frozen, but in Ohio, that’s about as “fresh” as I’m gonna get!

You can understand my excitement at finding it!   It was $9.99/lb, which seemed a little steep to me, but never having had the privilege of buying it before, I didn’t have much of a frame of reference.  So I bought it on faith, and looked up prices online when I got home.  Fresh fish is always market price, so it’s hard to find local prices online.  I did find a few online stores that sold frozen Sockeye, and they were around $15.00 – $18.95/lb!  For commercially canned Sockeye, the best price I found online is around $0.72 per ounce, if bought in bulk.  (My Sockeye was $0.62 per ounce.)

So go me!  Turns out I found an incredible deal!  I’m going to tweak our budget a little and go back to Giant Eagle and get another slab!

I researched online and read a few forums on the best way to can salmon, and ultimately decided to just follow The Ball’s instructions.  I was a bit thrown when it said not to add any liquid, but Ol’ Ball hasn’t done me wrong yet!

So without further ado…ok, maybe just a little more ado…

Canned Salmon (or any fish, except tuna)

What you will need:

  • 2lbs Salmon, your choice.  I obviously prefer Sockeye
  • 1/2 Cup Canning Salt
  • 8 Cups of Water
  • 10 Half pint or 5 pint jars, no larger*
  • Pressure Canner and supplies

*Because seafood is very low in acidity, you must can them in half-pint or pint jars.  Heat penetration of larger jars may be inadequate to destroy bacterial spores.  (Source: Ball Complete Book of Home Preserving, page 394)

Directions:


1. In a large stainless steel bowl, create a brine by dissolving the salt in the water.    Slice the salmon into pieces that will fit into your jars.  (I did 10 pieces – 2 per pint) Soak salmon in the brine in the refrigerator for 1 hour.


2. Prepare pressure canner and lids 30 minutes before you are ready to pack the fish into the jars.  Wash jars, but do not heat them since you will be raw-packing the fish.  (Putting chilled fish into hot jars could cause breakage.)

3. When the fish is done soaking, drain and rinse for 10 minutes.  I don’t have a picture for this step because I forgot it.  The step.  Not the picture.  If you skip this step accidentally too, don’t worry.  I don’t think it affected the salmon much, if at all!

(Mmmm…suddenly I have a strange craving for sushi…)

4. Pack salmon into jars, with the skin side out.   Leave at least a 1″ headspace.  DO NOT ADD LIQUID.  (I know it’s weird, but trust me!  The oils pulled from the fish during processing will fill the jar about halfway with liquid.)  Here the Ball Book says “Remove any visible air bubbles.”  That part made me laugh a little…isn’t the whole jar a giant air bubble if there’s no liquid in it?  But just for good measure I swished the plastic tool around a little bit, releasing imaginary air bubbles.


5. Put a little vinegar on a paper towel and clean the rims of the jars.


6. Remove the lids from the simmering water and seal the jars.  Tighten rings.

7. Place jars in canner, adjust water depth if needed (As long as you had at least 3″ in there to begin with, you’ll be fine).  Lock lid, allow pressure to build and vent for 10 minutes then close vent.  Set gauge at 10lbs, and once pressure is achieved cook for 100 minutes for both half pints and pints.


8. Turn off heat and allow pressure to return to zero naturally.  Wait 2 more minutes, then open vent.  Remove lid, wait 10 minutes, then remove jars to a towel and let cool.  When they are completely cool, check lids for resistance and store for up to 1 year.  Although if you’ve tried this recipe from Keeper of The Home, they won’t last 1 month!

That’s it!  I think so far this was the easiest canning adventure I’ve ever had.  In fact, it was so easy that I kept thinking “What did I forget?  What did I miss?”.  Turns out I did miss step 3, and I fretted for awhile that the salmon would turn out too salty as a result of that, but it is great!  I also think next time I’ll either pack more into the pint jars or use half-pint jars for the same amount (around 5-7 oz in each pint).  I think it’s fine how I did it, but it seems like a waste of space to me.  (And admittedly, aesthetically it’s kinda bugging me…)

So I wanted to be able to tell you how it tasted and show you pictures of the finished product, so I went ahead and opened one this morning.


It looks a little unappetizing with the skin on, but  I scraped the skin off easily and flaked it up.  It flaked the same way commercially canned salmon does.  The salmon aroma was very pleasant, not as fishy as I’ve smelled before.  (Although if you’re not a salmon-lover, it will probably smell pretty fishy to you.)

Nice color, eh?  It definitely is a few hues lighter than it’s original beautiful red, but I was impressed at how pink it still was after canning it.  Now it’s time to taste it!  I don’t know about you, but I don’t usually wake up thinking, “Mmm, how about some salmon for breakfast?”  Nah, I’m more of an eggs and toast or yogurt kinda girl.  However, I already had plans for lunch and dinner, and really wanted to get this post on here today.  Plus I really was curious about how it would taste!  A quick Internet search for salmon suggested omelets or quiches, which sounded pretty good to me.  But Ty wasn’t interested in broadening his breakfast taste buds past cereal and I didn’t really want to go all gourmet just for little old me.  So I chopped up a potato and fried that up with oil, butter and rosemary, then scrambled an egg with about 3 teaspoons of salmon and 1/4 tsp of dried dill.  I topped the scrambled egg with a slice of mozzarella/provolone blend, added a little drizzle of hot sauce on the potatoes and YUM!  That was a delicious breakfast!  (Ha, ha, Ty!  Sucker!  Hope that cereal was everything you thought it’d be!)  

The Verdict:

I am THRILLED to report that the salmon turned out excellent!  I will absolutely be canning my own salmon whenever possible!

Categories: Canning, Low-Acid, Seafood | Tags: , , , , , , , , ,

Blog at WordPress.com.